
Connectors
Sophos Connector
Connectors in Bloo
Updated 2026-08-17
Overview
The Sophos Central Connector enables secure integration with Bloo to fetch security logs, including alerts and events, for enhanced monitoring and threat detection.
Prerequisites
Before configuring the connector, ensure you have the following details from your Sophos Central account:
- Client ID – Obtained from Sophos API Credentials Management
- Client Secret – Generated during API credential creation
- Tenant ID – Unique identifier for your Sophos Central tenant
- Data Region – The geographical region of your Sophos Central instance
Step 1 — Get Your Client ID and Client Secret
- Log in to Sophos Central.
- Go to General Settings → API Credentials Management.
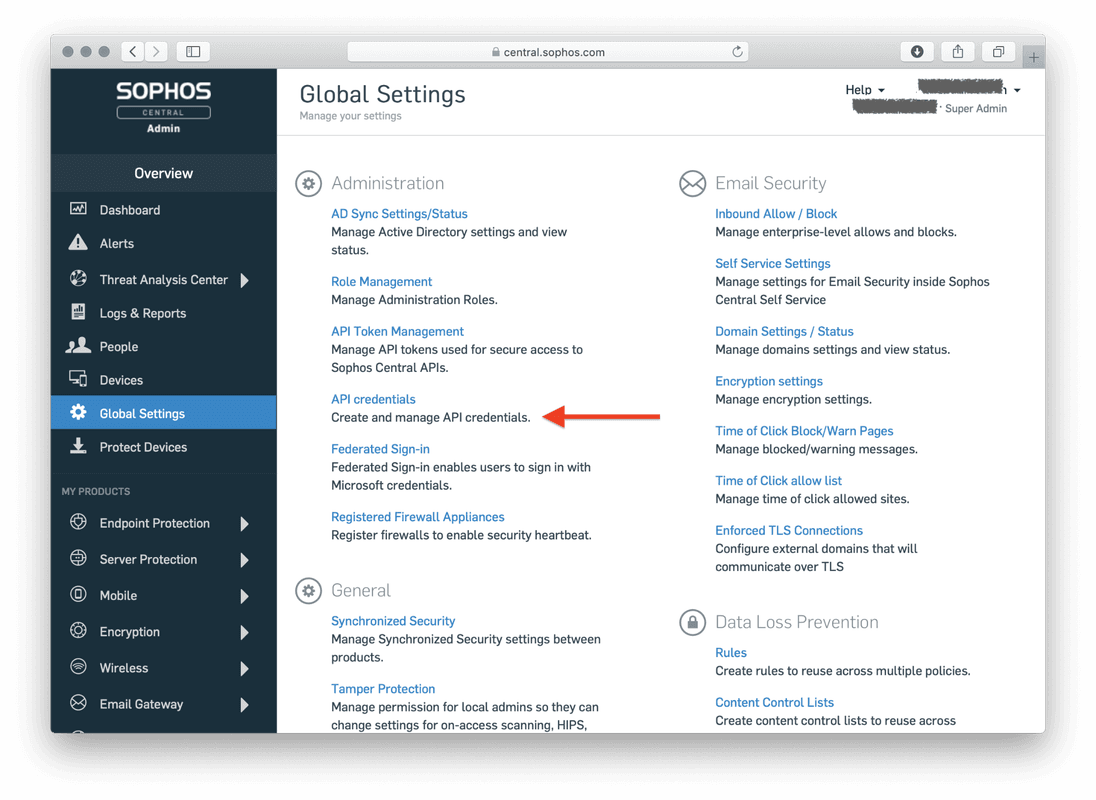
- Click Add Credentials.
- Enter a credential name and an optional description.
- Select Service Principal Super Admin as the role.
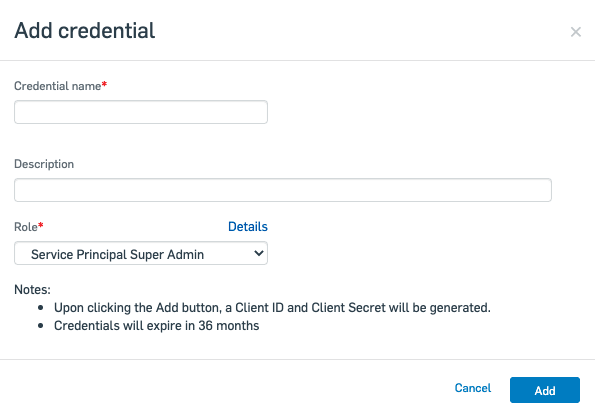
- Click Save. The credential summary page appears showing your Client ID.
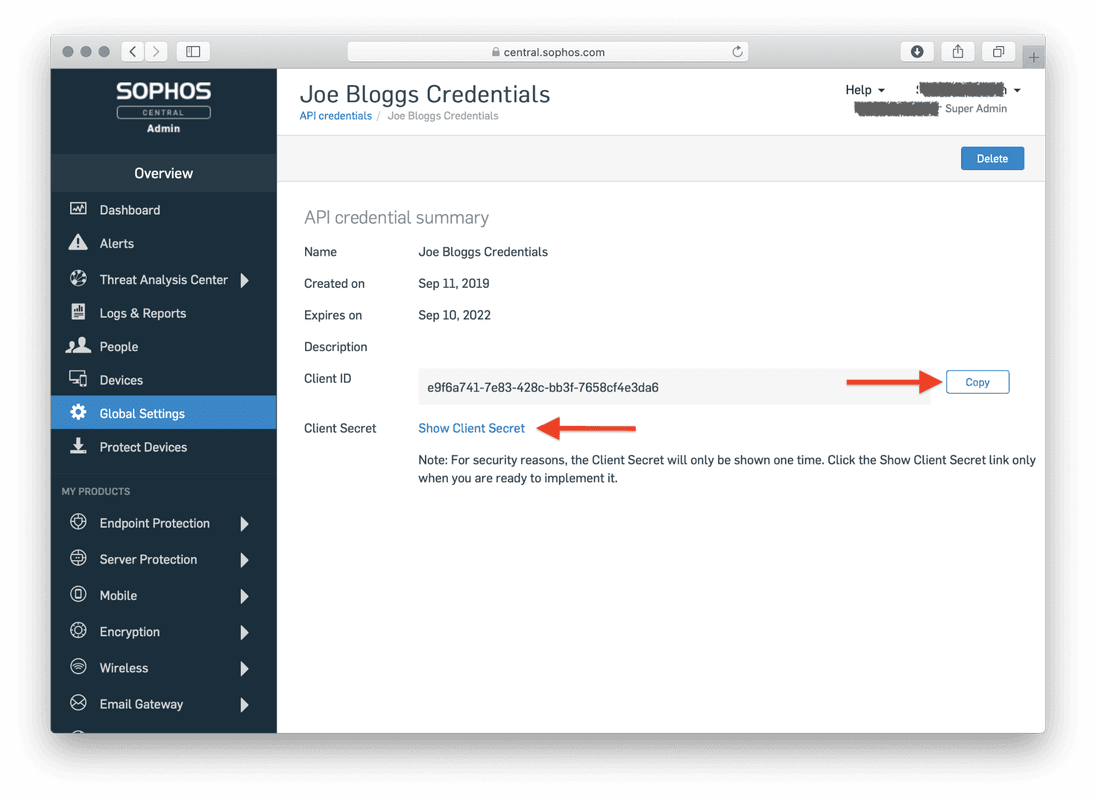
- Click Show Client Secret. Copy and store both the Client ID and Client Secret in a secure location.
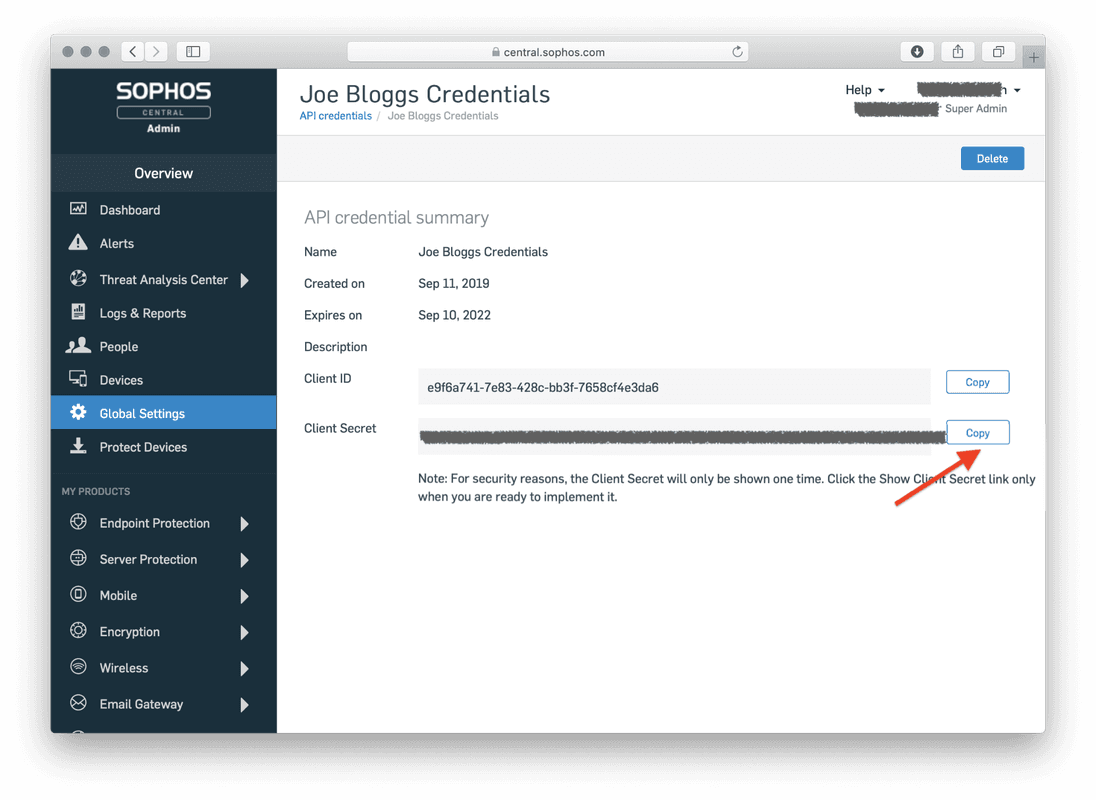
⚠ The Client Secret is shown only once. Once you close this page it cannot be retrieved. Store it securely immediately.
⚠ API credentials expire automatically. Sophos does not send an expiry alert — when the credential expires it is silently removed and the connector will stop working. You must create a new credential and update the configuration in Bloo.
Step 2 — Get Your Tenant ID and Data Region
Use the Client ID and Client Secret from Step 1 to run the following two commands. You will need a command line tool such as curl installed on your machine.
Command 1 — Get an Access Token
Run the following command, replacing the placeholders with your Client ID and Client Secret:
curl -X POST "https://id.sophos.com/api/v2/oauth2/token" \
-H "Content-Type: application/x-www-form-urlencoded" \
-d "grant_type=client_credentials" \
-d "client_id=<ENTER CLIENT ID>" \
-d "client_secret=<ENTER CLIENT SECRET>" \
-d "scope=token"Command 2 — Get Tenant ID and Data Region
Using the access token returned from Command 1, run:
curl -X GET "https://api.central.sophos.com/whoami/v1" \
-H "Authorization: Bearer <ACCESS_TOKEN_RETRIEVED_FROM_ABOVE>" \
-H "Accept: application/json"The response will look like this:
{
"id": "6c463484-2ec3-40e6-b4ec-49718fea1893",
"idType": "tenant",
"apiHosts": {
"global": "https://api.central.sophos.com",
"dataRegion": "https://api-in01.central.sophos.com"
}
}ℹ The
idfield is your Tenant ID. The Data Region is in the formatapi-{dataRegion}.central.sophos.com— copy only thedataRegionpart. In the example above, thedataRegionvalue isin01.
Configure the Sophos Connector in Bloo
All connector configuration is done from the Datasource page in Bloo.
| Field Name | Description |
|---|---|
| Connector Name | Enter a name for the connector. |
| Client ID | Enter the Client ID from Step 1. |
| Client Secret | Enter the Client Secret from Step 1. |
| Tenant ID | Enter the Tenant ID from the whoami response (the id field). |
| Data Region | Enter the dataRegion value only (e.g. in01, not the full URL). |
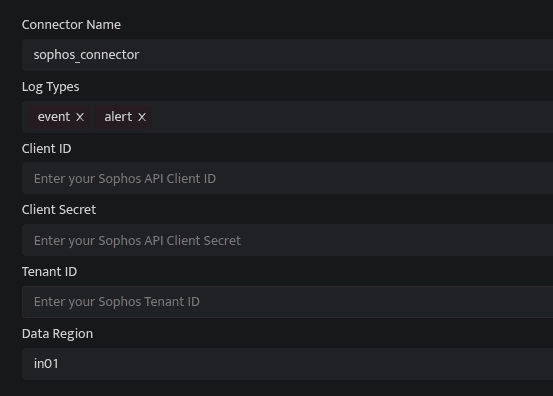
- Click Save after entering all the required details.
- Bloo will validate the configuration automatically.
- Navigate to Collection Status and confirm the connector is listed with a status of Active. This signifies the connector is configured successfully and data is ready to ingest.
✓ When the connector appears in Collection Status with status Active, it is configured successfully and data is ready to ingest.
Related Links
Bloo — Collection Status | Bloo — Connector Validation | Sophos — API Credentials Management | Sophos Central | Bloo — Troubleshooting Connector Validations
Related
Was this page helpful?