
Connectors
Azure NSG Connector
Connectors in Bloo
Updated 2026-08-17
Azure NSG integrates with Bloo using the pull method. Azure NSG (Network Security Group) is a Microsoft Azure service that filters network traffic to and from Azure resources. This connector pulls NSG network flow logs — records of all connections through your network security groups — from Azure Blob Storage into Bloo for monitoring and analysis.
Before You Begin — Prerequisites
You will need the following before configuring the connector in Bloo. Your Azure Network Security Groups must already exist.
| Requirement | Where to Get It | Notes |
|---|---|---|
| Azure Account | Sign in at portal.azure.com | Must have access to create storage accounts and enable NSG flow logs |
| Storage Account | Created in Step 1 below | Used to store the NSG flow log files |
| Storage Container | Created in Step 2 below | A container inside the storage account that holds the log files |
| NSG Flow Logs enabled | Enabled in Step 3 below via Network Watcher | Flow logs must be enabled on your NSG and pointed to the storage account |
| Connection String | Copied from Storage account → Access keys (Step 4 below) | Bloo uses this to read the flow log files from your storage account |
ℹ For reference, see the Azure documentation on Enable NSG flow logging and Create a storage account.
Step 1 — Create a Storage Account
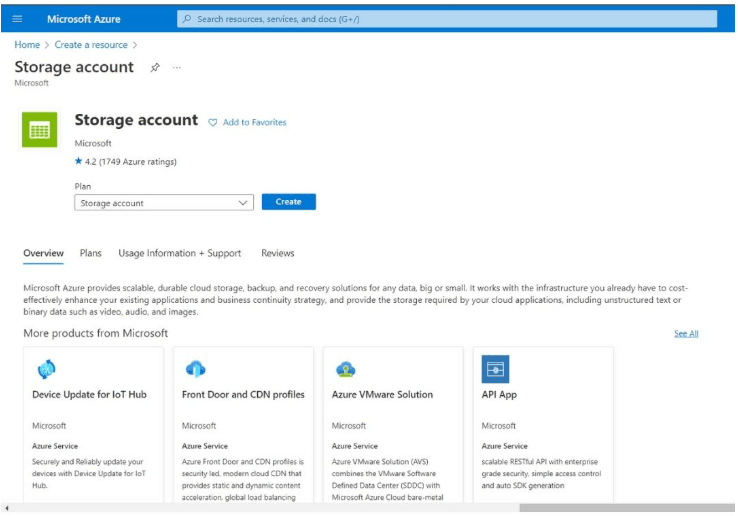
Create a new Azure Storage account. This is where Azure will write the NSG flow log files.
Sign in to the Azure portal at
From the left portal menu, select Storage accounts to display a list of your storage accounts. On the Storage accounts page, select New.
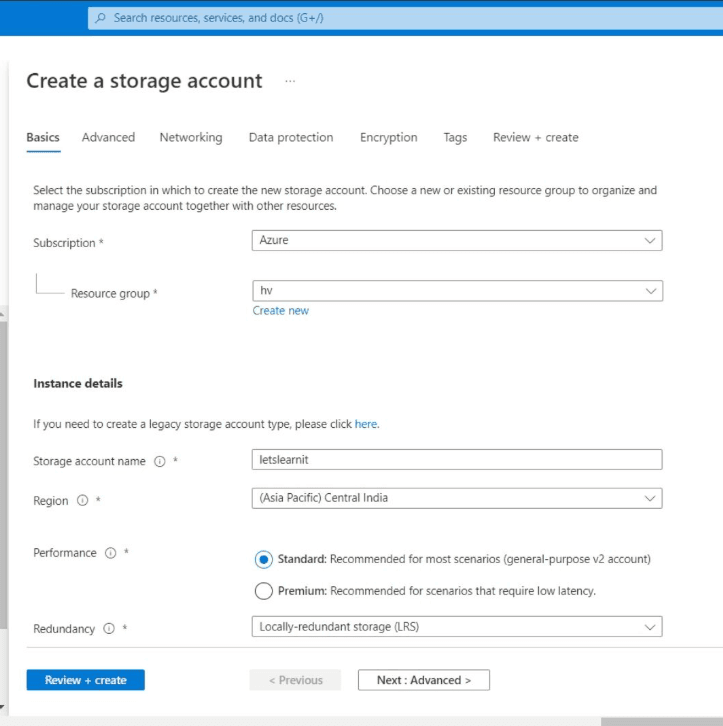
- On the Basics tab, provide the essential information for your storage account. Select Review + create to accept the default options and proceed to validate and create the account.
ℹ Storage accounts should have owner access roles assigned.
Step 2 — Create a Container
Create a container inside your storage account. This is where the NSG flow log files will be stored.
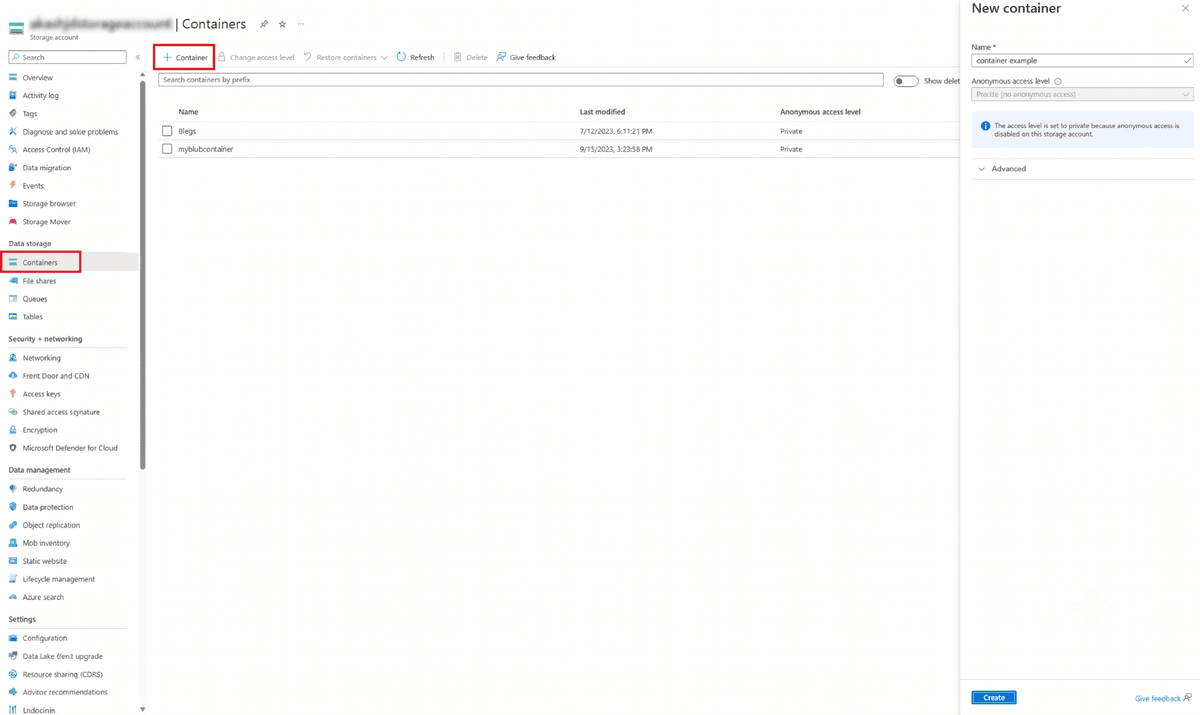
Navigate to your new storage account in the Azure portal. In the left menu for the storage account, scroll to the Blob service section, then select Containers.
Select the +Container button. Enter a name for your new container. The container name must be lowercase, must start with a letter or number, and can include only letters, numbers, and the dash (-) character. Click Create.
Step 3 — Enable NSG Flow Logs
Enable flow logging on your Network Security Group. This tells Azure to write network traffic logs to your storage account.
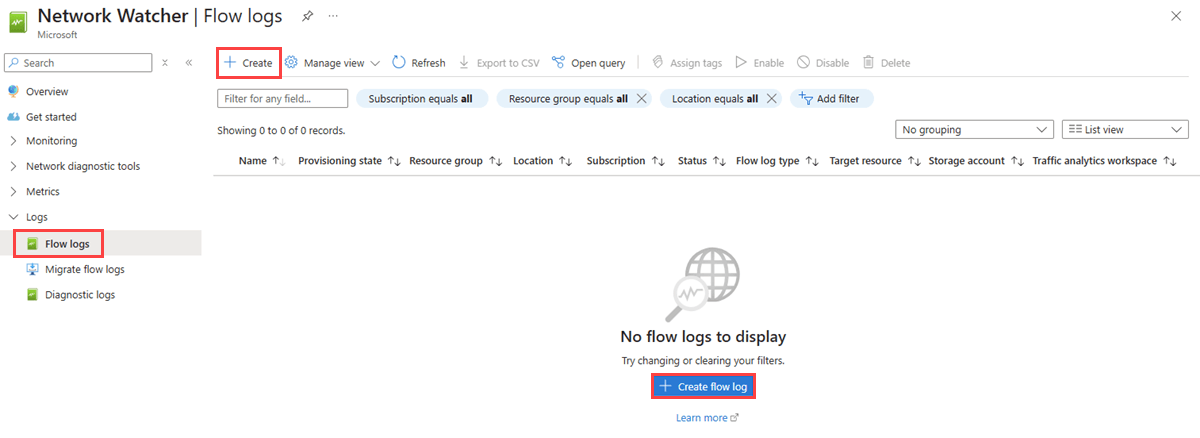
In the Azure portal search bar, type Network Watcher and select the Network Watcher service.
Under Logs, select NSG flow logs. Click +Create to create a new flow log.
- Fill in the flow log configuration:
- Subscription — select your Azure subscription.
- Network Security Group — select the NSG you want to enable flow logs for.
- Storage Account — select the storage account you created in Step 1.
- Retention (days) — enter the number of days to retain logs.
- Flow Logs Version — select Version 2 (recommended).
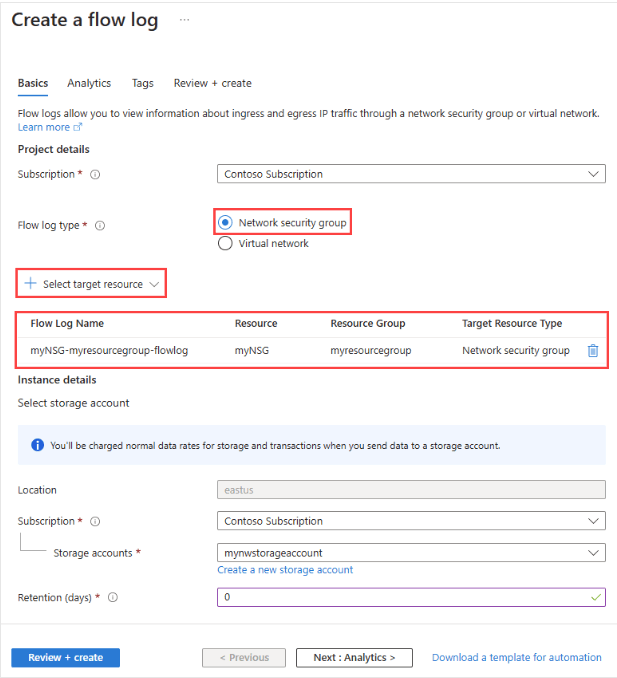
- Click Create to enable NSG flow logging.
ℹ For more details on enabling NSG flow logs, see the Azure documentation: NSG flow logs portal.
Step 4 — Get the Storage Connection String
Copy the Connection String from your storage account. Bloo uses this to read the NSG flow log files.
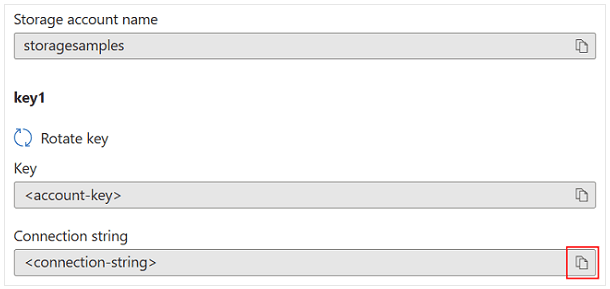
Navigate to your storage account in the Azure portal. Under Settings, select Access keys.
Under key1, click the copy icon next to the Connection string field. Store it securely — you will paste this into Bloo.
Step 5 — Configure the Connector in Bloo
With your Connection String ready, set up the connector on the Datasource page in Bloo.
In Bloo, navigate to the Datasource page and click Add Datasource.
Search for and select Azure NSG.
Fill in the configuration fields as described below.
| Field | Description | Example |
|---|---|---|
| Connector Name | A unique display name for this connector instance in Bloo. | AzureNSG-Prod |
| Connection String | Paste the Storage Account Connection String copied in Step 4. It starts with DefaultEndpointsProtocol=https... | Paste from Step 4 |
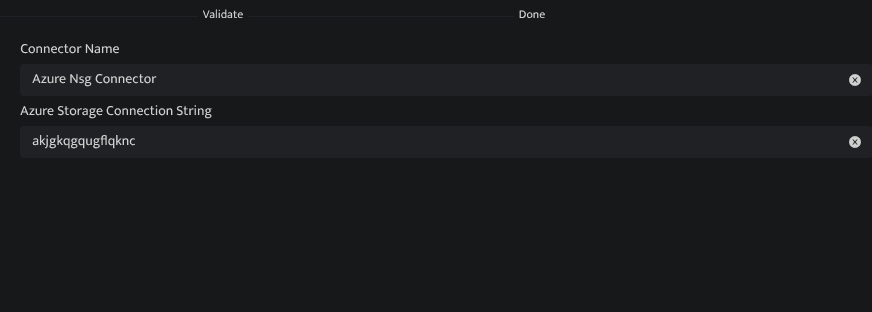
- Click Save. The connector proceeds directly to validation.
✓ Go to Collection Status in Bloo and verify the Azure NSG connector shows status Active.
Related: How to Configure Connectors Collection Status Azure NSG Connector
Related
Was this page helpful?