
Connectors
Office 365 Connector
Connectors in Bloo
Updated 2026-08-17
Overview
The Office 365 Management Activity API provides information about various user, admin, system, and policy actions and events from Office 365 and Azure Active Directory activity logs. The Office 365 Connector uses the pull method by subscribing to the Office 365 Management Activity API content types.
Prerequisites
Office 365 Management API credentials:
- Tenant ID
- Client Key
- Secret Key
- Tenant Domain
Note Azure Active Directory has been rebranded to Microsoft Entra ID. If you see Microsoft Entra ID in the portal, it is the same service. The steps below remain the same.
Step 1 — Find Tenant ID
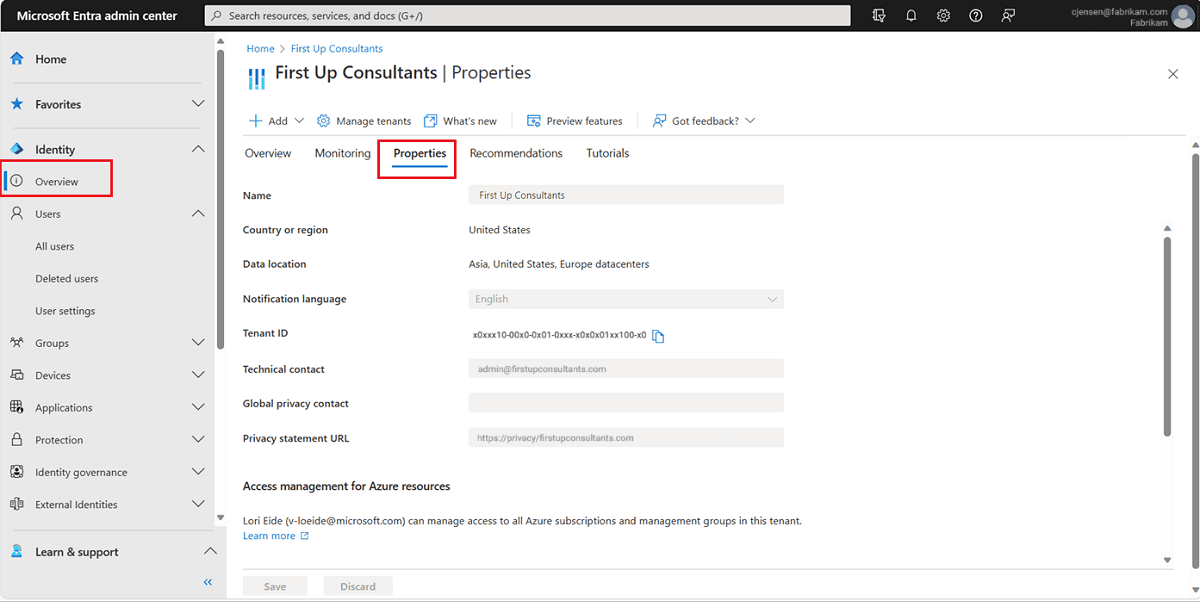
- Log in to the Azure Management Portal with the credentials of the tenant subscribed to Microsoft Office 365.
- In the navigation menu, select Azure Active Directory.
- In Manage, select Properties.
- Copy the Tenant ID. Use this value for the Tenant ID field in Bloo.
Step 2 — Find Tenant Domain
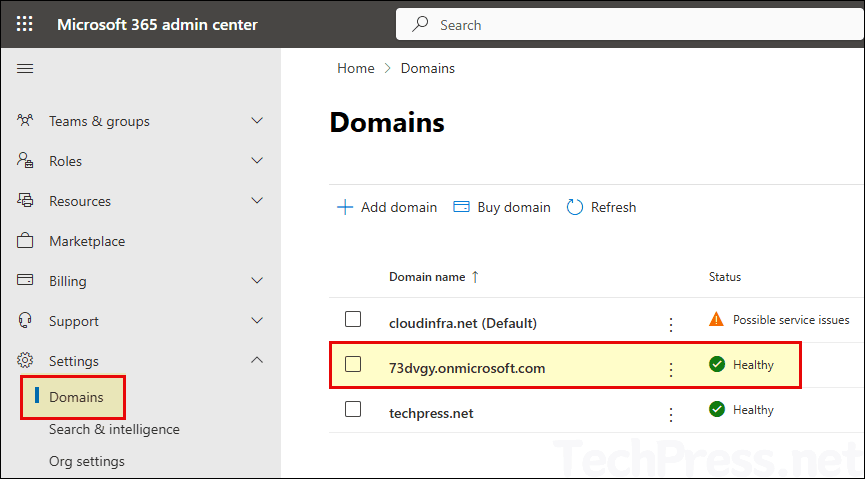
- Log in to your Office 365 Admin Center as an Administrator.
- Click Show All.
- Go to Settings and click Domains.
- Find a domain that ends with
.onmicrosoft.com. This is your Office 365 Tenant Domain.
Step 3 — Register Application in Azure AD
- Log in to the Azure Management Portal with the credentials of the tenant subscribed to Microsoft Office 365.
- In the navigation menu, select Azure Active Directory.
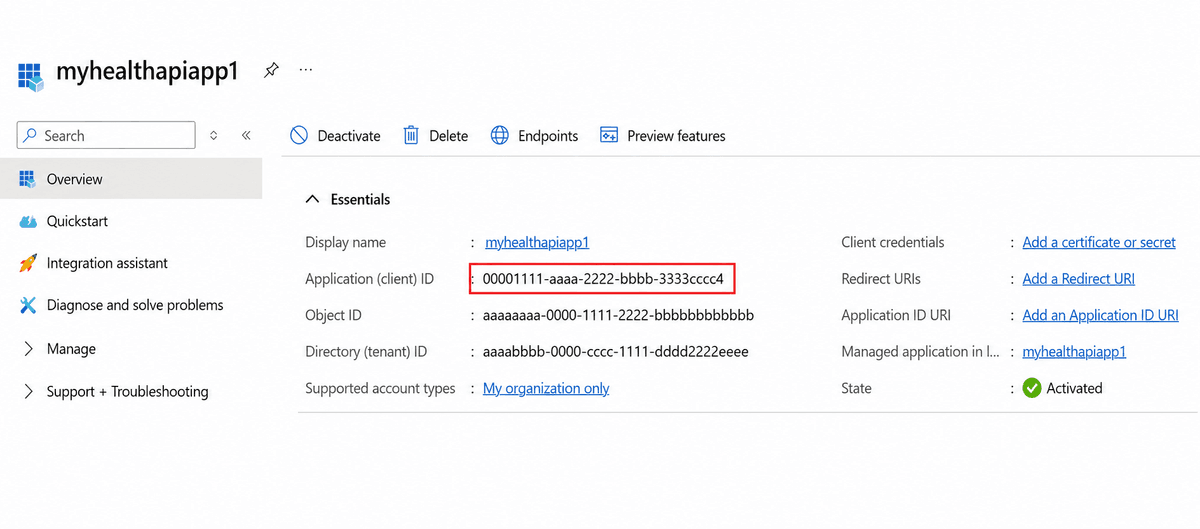
- In the Manage section, select App Registration and click New Registration.
- Enter the Display Name for the application.
- In the Supported account types section, select the type of account to use the application or to access the API.
- Click Register.
- Copy and store the Application (client) ID value. Use this value for the Client Key field in Bloo.
Step 4 — Generate a Client Secret
- Navigate to the application you registered in Step 3.
- From the Manage pane, select Certificates & secrets → Add New client secret.
- Enter a Description and select an Expiry Date for the Client Secret, then click Add.
- Copy and store your client secret key value. Use this value for the Secret Key field in Bloo.
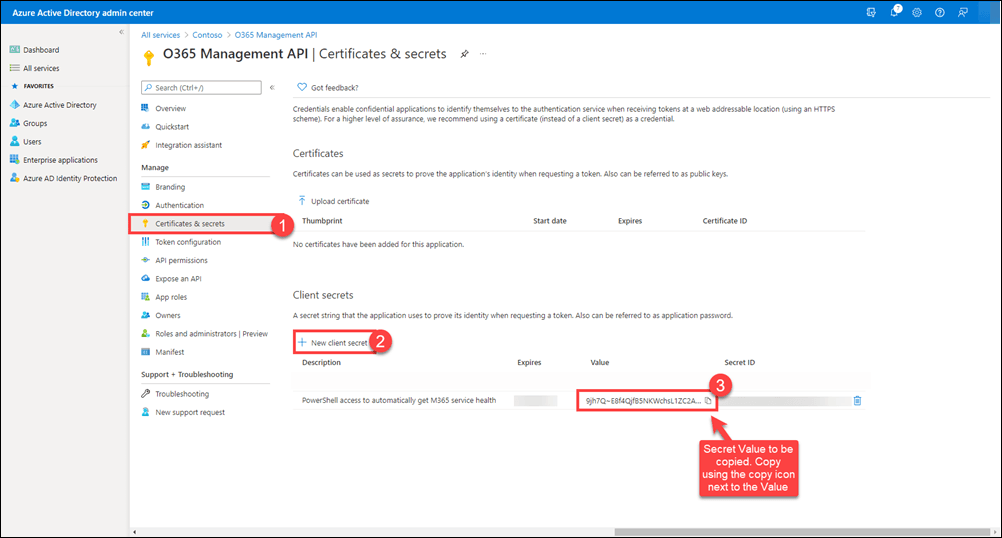
Warning Copy and store your client secret value immediately — it cannot be retrieved after you close this page. Client secrets have an expiry date. When your secret expires, the connector will stop working. Generate a new secret and update the connector configuration in Bloo before it expires.
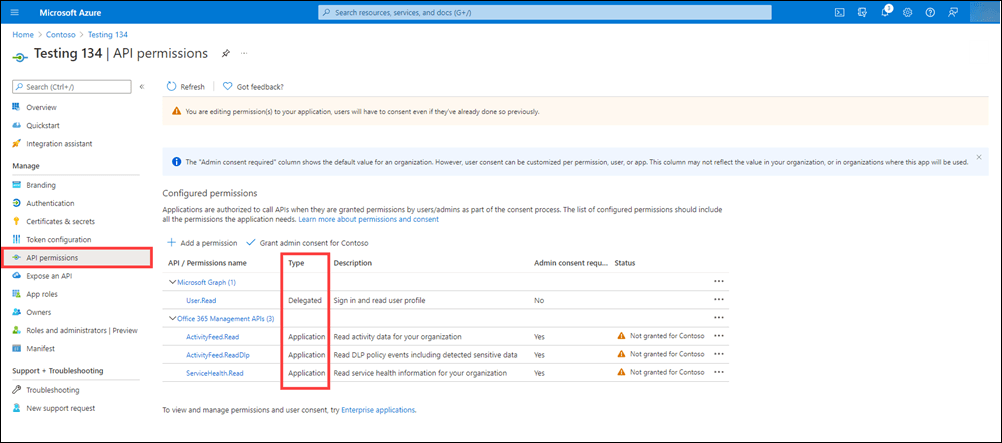
Step 5 — Specify API Permissions
- Navigate to the application you registered in Step 3.
- Click API Permissions → Add a permission → choose Office 365 Management APIs → Delegated permissions, then select the following and click Add permissions:
- Activity Feed
ActivityFeed.ReadActivityFeed.ReadDlp
- ServiceHealth
ServiceHealth.Read
- Activity Feed
- Click Application permissions, then select the following and click Add permissions:
- Activity Feed
ActivityFeed.ReadActivityFeed.ReadDlp
- ServiceHealth
ServiceHealth.Read
- Activity Feed
- In the API permissions window, click Grant admin consent and click Yes to confirm.
Step 6 — Turn on Audit Log Search
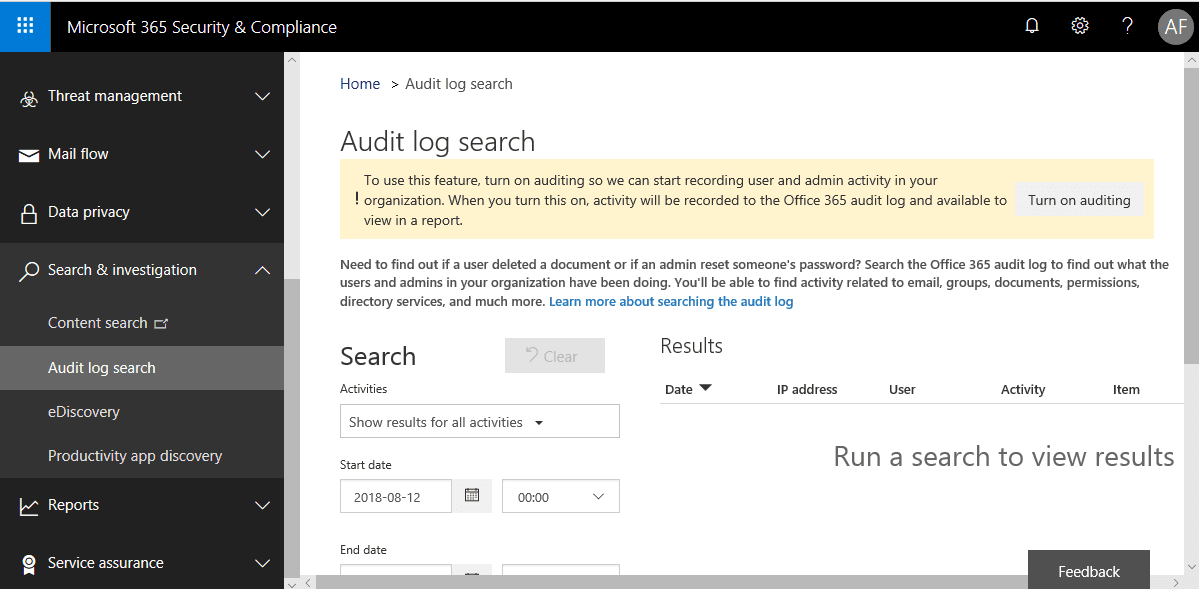
Note For most Microsoft 365 enterprise plans, audit logging is already turned on by default. If the Turn on auditing button is not visible in the compliance center, auditing is already enabled for your organization.
Go to the compliance center at compliance.microsoft.com and sign in.
Note The legacy compliance portal at protection.office.com redirects to compliance.microsoft.com. Both URLs take you to the same place.
In the compliance center, go to Search → Audit log search.
Click Turn on auditing.
Step 7 — Create a Subscription in Azure Portal
- Sign in to the Azure portal.
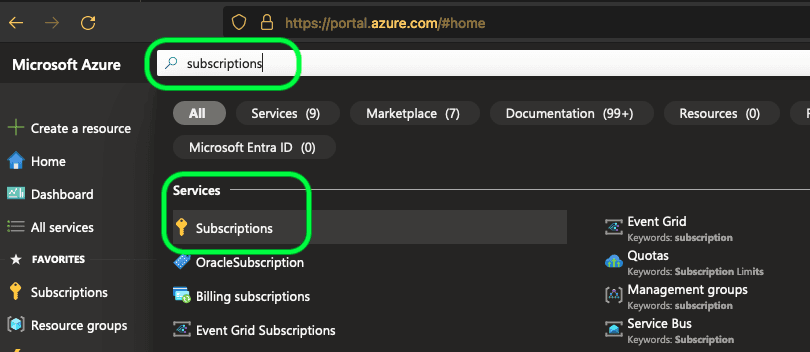
- Search for Subscriptions.
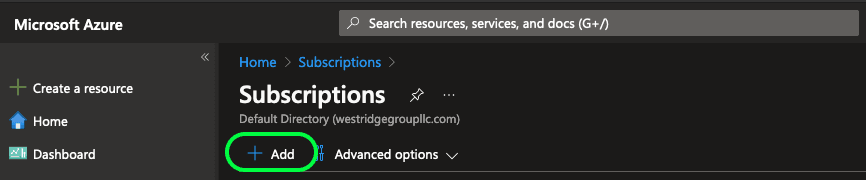
- Select Add.
- If you have access to multiple billing accounts, select the billing account for which you want to create the subscription.
- Fill the form and click Create. The tables below list the fields on the form for each type of billing account.
Step 8 — Check Your Subscriptions
- Visit the Microsoft Office website, click on the Sign-in button, and sign in using the email address you used to purchase your Office 365 subscription.
- Once you sign in to your Office account, you will see the subscription details page.
- The page displays the details of your Microsoft Office 365 subscription.
Configure the Office 365 Connector in Bloo
All connector configuration is done from the Datasource page in Bloo.
| Field | Description |
|---|---|
| Connector Name | Enter a name for the connector. |
| Tenant ID | Tenant ID or Directory ID of the Azure AD subscription. |
| Tenant Domain | Tenant domain for Office 365 (example.onmicrosoft.com). |
| Client Key | Application ID of the created client application. |
| Secret Key | Secret key for the created application. |
| Publisher ID | ID of the publisher for the created application. This is mainly used for webhooks. The value should be None for this implementation. |
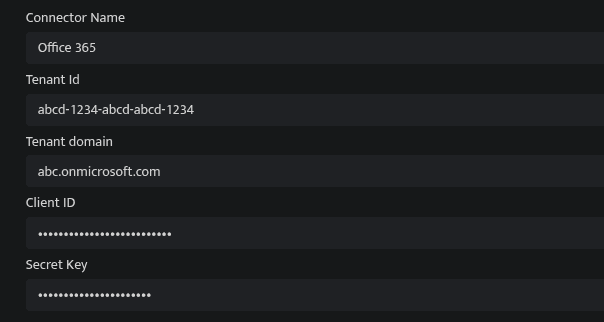
- Click Save after entering all the required details.
- Bloo will validate the configuration automatically.
- Navigate to Collection Status and confirm the connector is listed with a status of Active. This signifies the connector is configured successfully and data is ready to ingest.
Confirmed When the connector appears in Collection Status with status Active, it is configured successfully and data is ready to ingest.
Related Links
Bloo — Collection Status | Bloo — Connector Validation | Microsoft — Get started with Office 365 Management APIs | Microsoft — Turn on audit log search | Bloo — Office 365 Troubleshooting | Bloo — Troubleshooting Connector Validations
Related
Was this page helpful?