
Connectors
1Password Connector
Connectors in Bloo
Updated 2026-08-17
1Password integrates with Bloo using the pull method to retrieve event logs via the 1Password Events API. Once configured, Bloo continuously polls the API to collect event data from your 1Password environment for monitoring, correlation, and alerting.
Before You Begin — Prerequisites
You'll need the following from your 1Password account before configuring the connector in Bloo.
| Requirement | Where to Get It | Notes |
|---|---|---|
| 1Password Account | https://start.1password.com/signin | Must have access to create integrations |
| Base URL | Servers section of the 1Password Events API docs (https://developer.1password.com/docs/events-api/reference/#servers) | Selected from a dropdown in Bloo |
| Log Types | Chosen during connector configuration in Bloo | Select only the categories your team needs |
| Access Token | Generated from 1Password Integrations settings (Step 1 below) | Copy and save immediately — shown only once at creation |
Warning The Access Token is displayed only once at the time of creation. If you miss copying it, you must delete the integration and create a new one.
Step 1 — Generate an Access Token in 1Password
Follow these steps inside your 1Password account to create the access token Bloo needs.
Sign in to your 1Password account at
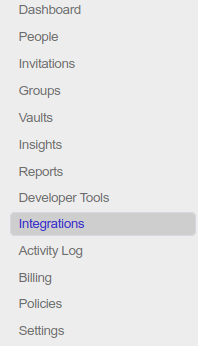
Click Integration in the left-hand sidebar.
- Click Directory at the top of the page.

- Scroll down to the Events Reporting section and click Other.

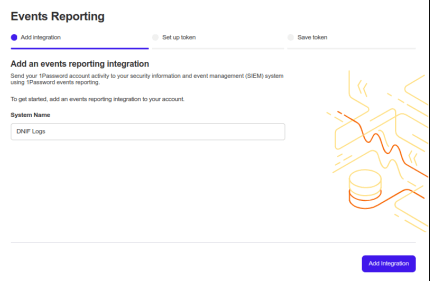
- Enter a System Name for the integration (e.g., Bloo-Integration), then click Add Integration.
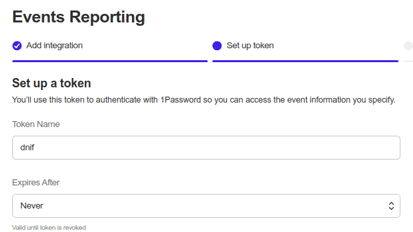
- Enter a name for the token and choose the token expiration period.
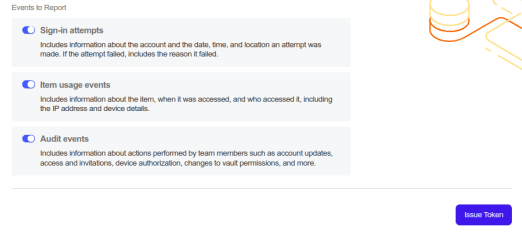
- Select the event types your token will have access to, then click Issue Token to generate the access token.
- Copy and securely store the token. Click Save in 1Password and choose which vault to save it to.
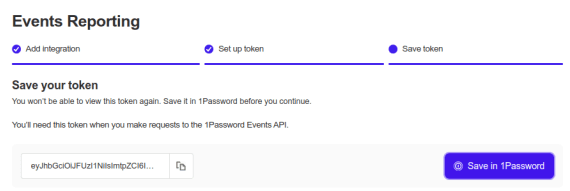
Warning The Access Token is visible only on this screen. Copy it before navigating away — it cannot be retrieved afterward.
Step 2 — Configure the Connector in Bloo
With the credentials from Step 1, set up the connector on the Datasource page in Bloo.
- In Bloo, navigate to the Datasource page and click Add Datasource.
- Search for and select 1Password.
- Fill in the configuration fields as described below.
Required fields:
| Field | Description | Example |
|---|---|---|
| Connector Name | A label to identify this connector instance in Bloo. | 1Password-Prod |
| Base URL | Select your 1Password API server region from the dropdown. | — |
| Log Types | Select the event log categories to collect from the dropdown. | — |
| Access Token | Paste the access token generated in Step 1. | Paste from Step 1 |
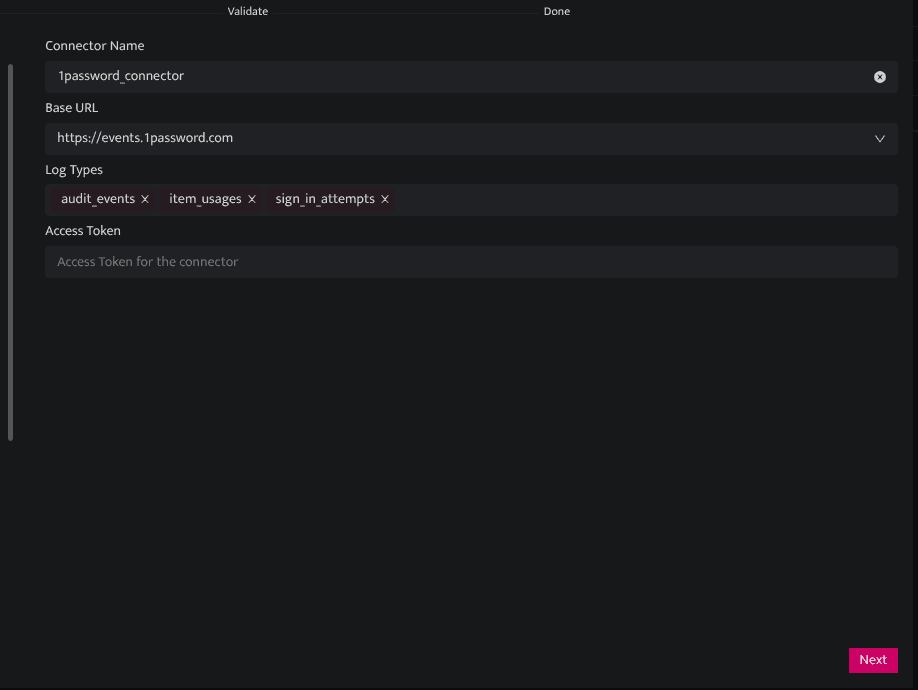
- Click Save. The connector proceeds directly to the validation stage.
Confirmed To confirm the connector is working, go to Collection Status in Bloo and verify the 1Password connector is listed with status Active. This means the connection has been validated and data ingestion has begun.
Related: How to Configure Connectors, Collection Status
Related
Was this page helpful?