
Connectors
Salesforce Pub/Sub Connector
Connectors in Bloo
Updated 2026-08-17
Overview
Salesforce is a customer relationship management solution that brings companies and customers together. Salesforce Connector pulls the event monitoring data that contains information useful for assessing organization usage trends and user behavior.
Prerequisites
- Connectivity with Salesforce API using valid credentials.
- Required credentials:
- Username
- Password
- Consumer key
- Consumer secret
- Security token
Steps to Set Up Salesforce Account
Create a Connected App
Note As of Salesforce Spring '26 (February 2026), creation of new Connected Apps is disabled by default. If you already have a Connected App configured, proceed with the steps below — existing Connected Apps continue to work. If you need to create a new Connected App, contact Salesforce Support to enable this capability for your org.
Login to the Salesforce Administrator account.
Click on the setup icon on the navigation bar.
Navigate to the Platform Tools tab on the left panel.
Navigate to Apps → App Manager.
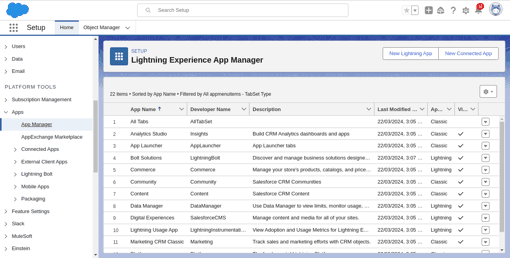
- Click New Connected App.
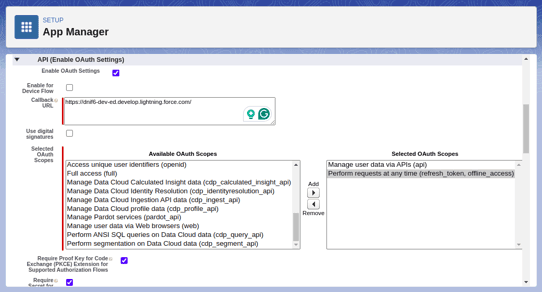
Fill out the necessary fields and select the Enable OAuth Settings checkbox.
Enter a value for callback URL.
Select Manage user data via APIs (api) and Perform requests at any time (refresh_token, offline_access) in the Selected OAuth Scopes column.
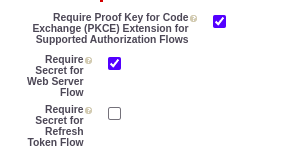
Uncheck the Require Secret for Refresh Token Flow checkbox.
Click Save.

Navigate to Platform Tools → Apps → App Manager.
Navigate to your created connected app and click on the arrow on the right side.
Select View option from the menu.
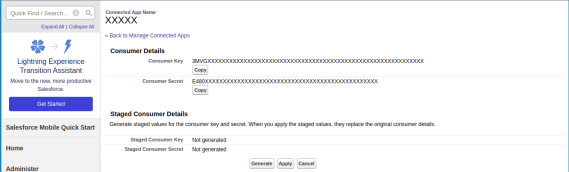
Navigate to API (Enable OAuth Settings) section, click on Manage Consumer Details button.
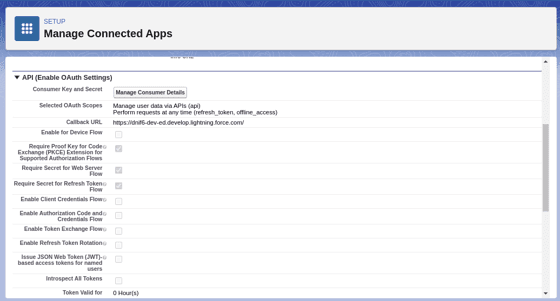
- Copy the values of the consumer key and consumer secret and keep it.
Create User Profiles
User profiles define the user's access to objects, data, and tasks allowed to the user within the application.
Login to the Salesforce administrator account.
Click on the setup icon on the navigation bar.
Navigate to the ADMINISTRATION tab on the left panel.
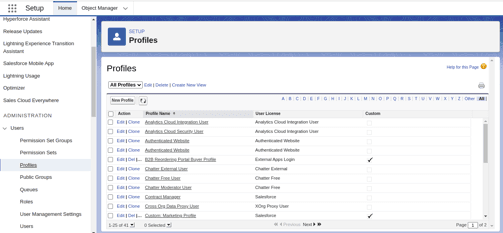
Navigate to Users → Profiles section.

Click on the New Profile button.
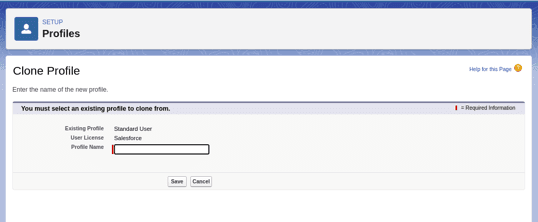
Select the existing profile as a Standard User and Clone it. Specify a name for the profile.
Click Save.
Now click on the edit button.
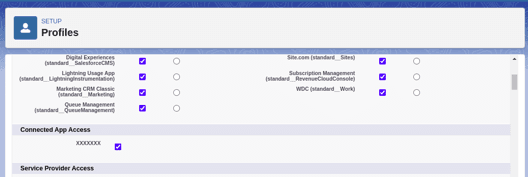
- Navigate to Connected App Access, select the connected apps you want to access using this profile.
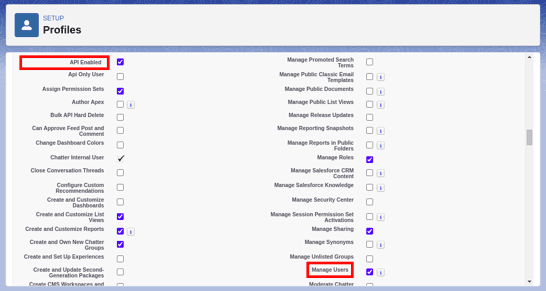
Navigate to Administrative Permissions, select API Enabled and Manage Users checkbox.
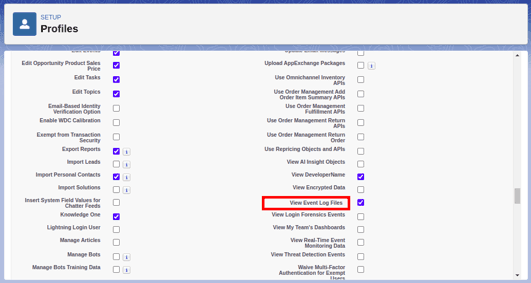
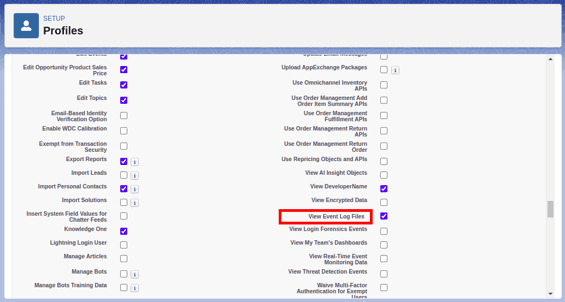
Navigate to General User Permissions and select View Event Log Files checkbox.
- Click Save.
Create a User in Salesforce
Login to the Salesforce administrator account.
Click on the setup icon on the navigation bar.
Navigate to the ADMINISTRATION tab on the left panel.
Navigate to Users → Users.
- Click on New User.
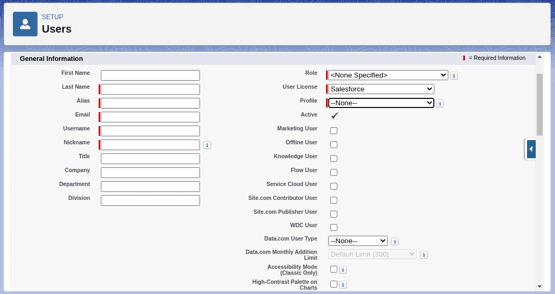
- Fill out the necessary fields, select the user license as Salesforce, and select the profile created in the previous step.
To obtain a user password, select the Generate new password and notify the user immediately checkbox.
Click on Save.
Enable OAuth Permission in Salesforce
Login to the Salesforce administrator account.
Click on the setup icon on the navigation bar.
Navigate to the SETTINGS → Identity tab on the left panel.

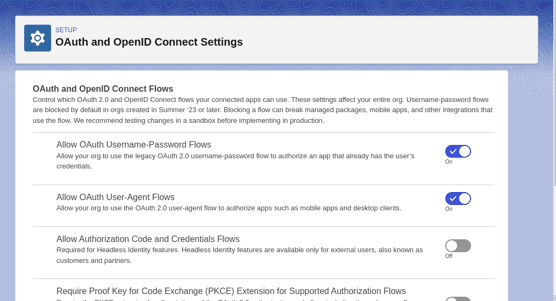
Navigate to OAuth and OpenID Connect Settings.
Enable Allow OAuth Username-Password Flows.
Get Security Token
Login to Salesforce using the Salesforce account to be used by the connector.
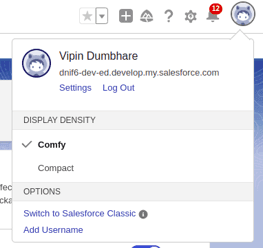
Click the view profile section located in the upper right corner, then click Settings.
- In the right panel, navigate to My Personal Information → Reset My Security Token.
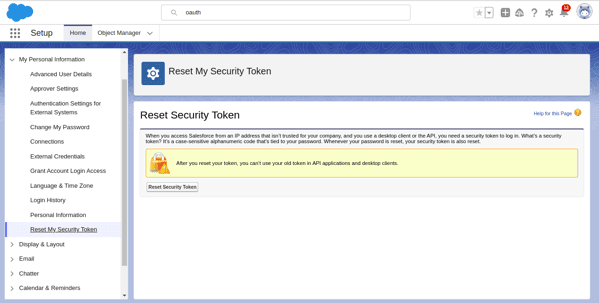
- Click Reset Security Token. The token will be sent to you via email.
Enable the Streaming Events to Forward Logs to Bloo
Login to the Salesforce administrator account.
Click on the setup icon on the navigation bar.
Navigate to the PLATFORM TOOLS tab on the left panel.
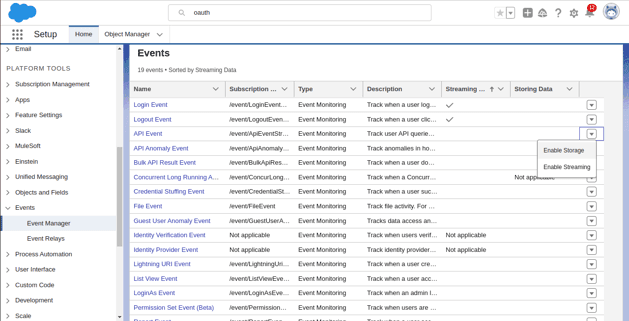
Navigate to Events → Event Manager.
Click on the arrow on the right side.
Click on Enable Streaming.
Configure the Salesforce Pub/Sub Connector in Bloo
All connector configuration is done from the Datasource page in Bloo.
| Field | Description |
|---|---|
| Connector Name | Enter a name for the connector. |
| Salesforce PubSub User | Enter the Salesforce username. |
| Salesforce PubSub User Password | Enter the Salesforce user password. |
| Consumer Key | Enter the Salesforce Consumer key. |
| Consumer Secret | Enter the Salesforce Consumer secret. |
| Security Token | Enter the Salesforce Security Token. |
| Subscription Channels | Select the subscription channel from which you want to fetch the log. |
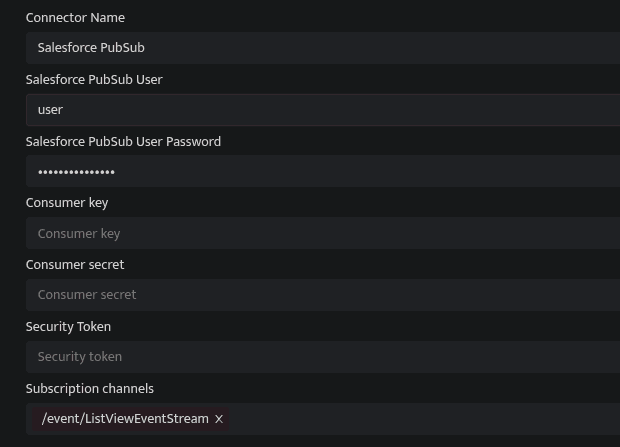
Click Save after entering all the required details.
Bloo will validate the configuration automatically.
Navigate to Collection Status and confirm the connector is listed with a status of Active. This signifies the connector is configured successfully and data is ready to ingest.
Confirmed When the connector appears in Collection Status with status Active, it is configured successfully and data is ready to ingest.
Related Links
Bloo — Collection Status | Bloo — Connector Validation | Salesforce — New Connected Apps Restricted in Spring '26 | Bloo — Salesforce Troubleshooting | Bloo — Troubleshooting Connector Validations
Related
Was this page helpful?