
Connectors
Akamai NetStorage Connector
Connectors in Bloo
Updated 2026-08-17
Akamai NetStorage integrates with Bloo to read and ingest content directly from your NetStorage account. Once configured, Bloo continuously pulls log files stored in your NetStorage upload directories for ingestion, search, and alerting.
Before You Begin — Prerequisites
You'll need the following from your Akamai NetStorage account before configuring the connector in Bloo.
| Requirement | Where to Get It | Notes |
|---|---|---|
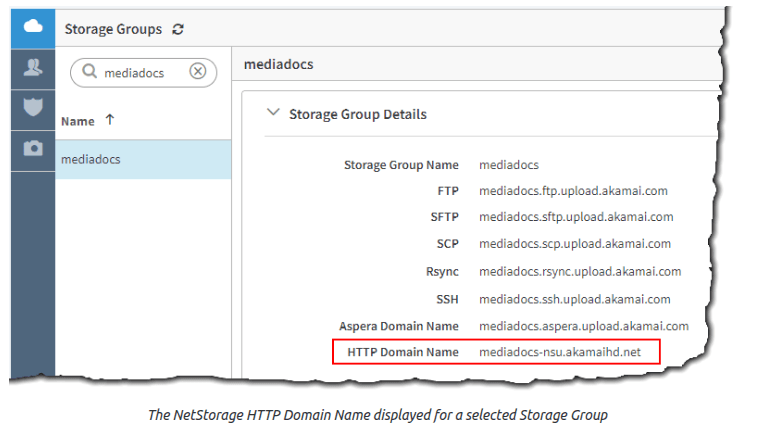
| NetStorage Hostname | Found under Storage Groups → click your storage group → Storage Group Details → HTTP Domain Name | Format: [prefix]-nsu.akamaihd.net |
| NetStorage Key Name | The Upload Account ID you set when creating the upload account | Used as the identifier when authenticating via HTTP API |
| NetStorage Key | Generated under Access Methods → NetStorage HTTP CMS API tab → click + Add HTTP API Key | Treat this like a password — copy and store it securely |
| NetStorage CP Code | The numeric CP code of the upload directory within your storage group | Found under Upload Directory Association when creating or editing the upload account |
ℹ For further reference, see the Akamai documentation: Create an Upload Account and NetStorage Usage API.
Step 1 — Gather Credentials from Akamai NetStorage
Follow these steps inside your Akamai account to locate or create the credentials Bloo needs.
In Akamai, navigate to Origin Services → NetStorage in the left menu.
Get your NetStorage Hostname from the Storage Groups section:
a. Click Storage Groups in the left menu.
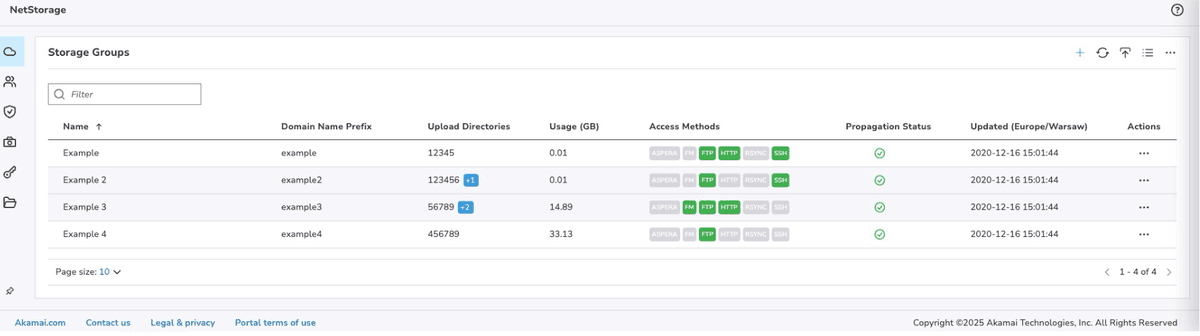
b. Click your storage group to open its details.
c. In the Storage Group Details section, copy the HTTP Domain Name. This is your NetStorage Hostname (format: [prefix]-nsu.akamaihd.net).
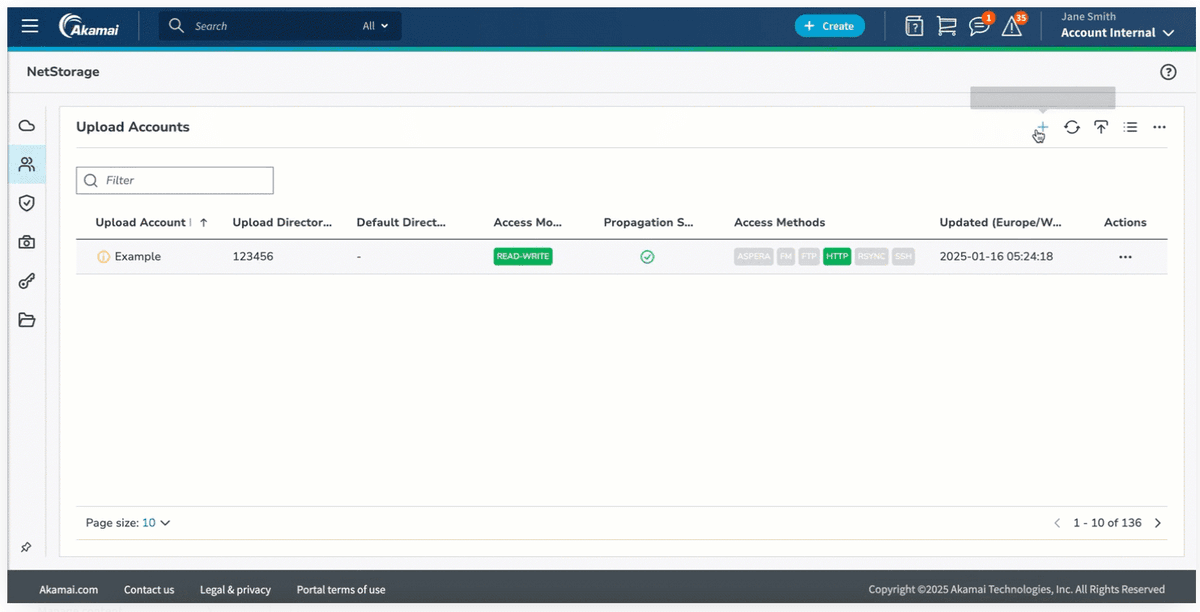
Go to Upload Accounts in the left menu.
- If you already have an upload account: click it to open it, then click the Edit button.
- If you need to create one: click the + icon, then fill in the Basic Information section with an Upload Account ID and contact email. The ID you enter here is your NetStorage Key Name.
- Generate your NetStorage Key. In the Access Methods section, click the NetStorage HTTP CMS API tab, then click + Add HTTP API Key. A key is generated — click Copy Key and save it somewhere safe. This is your NetStorage Key.
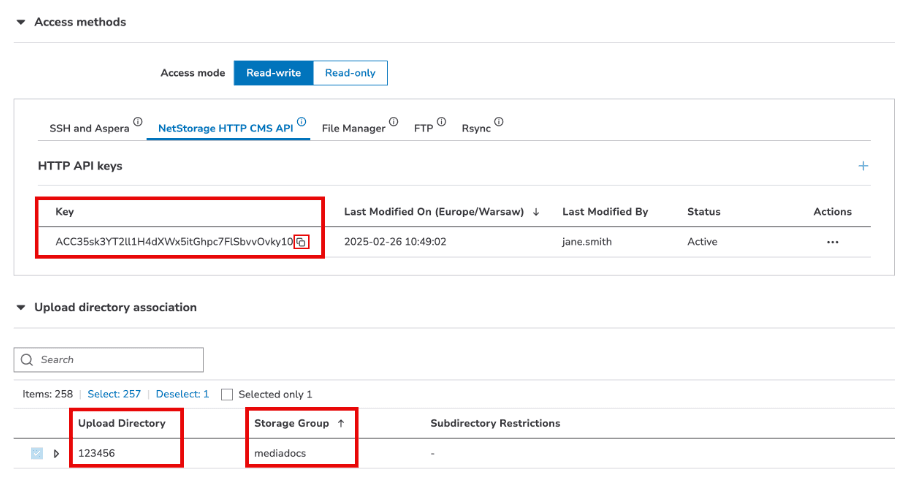
⚠ Important: The NetStorage Key is shown only once. Copy it now using Copy Key — you cannot retrieve it again. Changes also take 60–120 minutes to fully activate across Akamai's network, so configure Bloo only after receiving the activation email.
- Note your CP Code. Still in the same form, scroll down to the Upload Directory section. You will see a list of upload directories, each with a numeric code next to it — for example, 360949. That number is your NetStorage CP Code.
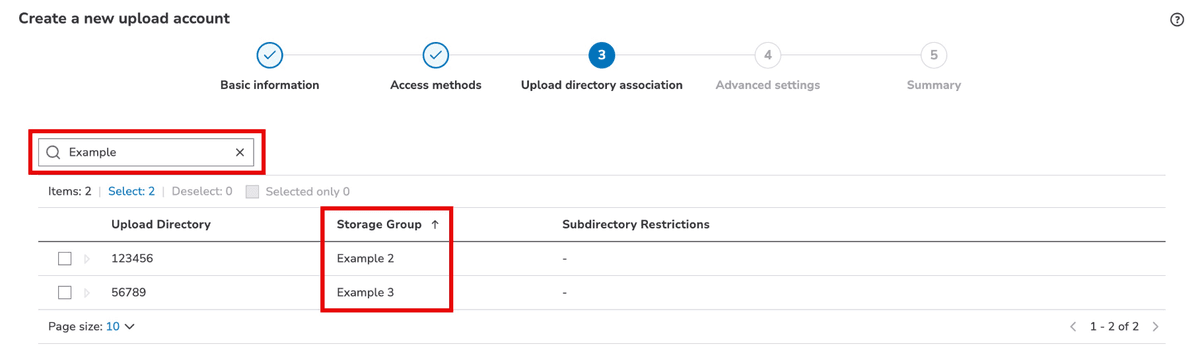
- Save the account by clicking Save at the bottom of the form.
Step 2 — Configure the Connector in Bloo
With the credentials from Step 1, set up the connector on the Datasource page in Bloo.
- In Bloo, navigate to the Datasource page and click Add Datasource.
- Search for and select Akamai NetStorage.
- Fill in the configuration fields as described below.
| Field | Description | Example |
|---|---|---|
| Connector Name | A unique display name for this connector instance in Bloo. | Akamai-NS-Prod |
| NetStorage Hostname | Enter your NetStorage hostname. | mysite-nsu.akamaihd.net |
| NetStorage Key Name | Enter the ID of your upload account (the Key Name). | bloologging |
| NetStorage Key | Enter the NetStorage Key generated when HTTP API authentication was enabled. | Paste from Step 1 |
| NetStorage CP Code | Enter the numeric CP code of your upload directory. | 360949 |
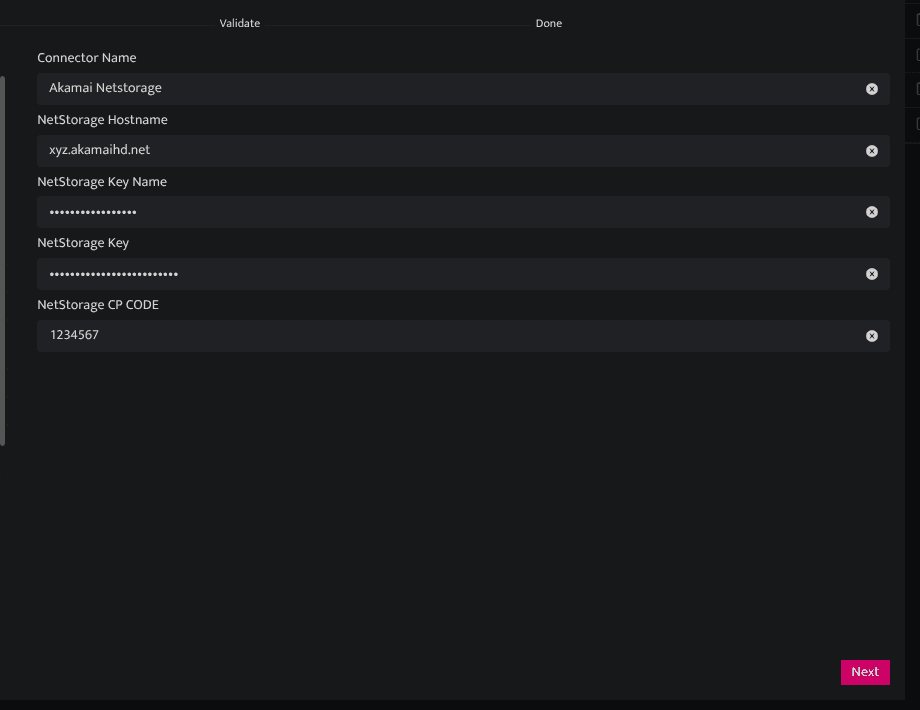
- Click Save. The connector proceeds directly to validation.
✓ To confirm the connector is working, go to Collection Status in Bloo and verify the Akamai NetStorage connector is listed with status Active. This means the connection has been validated and data ingestion has begun.
Related: How to Configure Connectors, Collection Status
Related
Was this page helpful?