
Connectors
Azure Blob Storage Connector
Connectors in Bloo
Updated 2026-08-17
Azure Blob Storage integrates with Bloo using the pull method. Bloo reads log files written to your Azure Blob Storage containers by monitoring an Azure Storage Queue. Every time a new log file is written to your storage account, a notification is sent to the queue and Bloo picks it up immediately.
Before You Begin — Prerequisites
You will need the following before configuring the connector in Bloo. Your Azure Storage account must already exist.
| Requirement | Where to Get It | Notes |
|---|---|---|
| Azure Account | Sign in at portal.azure.com | Must have admin access to create storage accounts and app registrations |
| Storage Account | Created in Step 1 below | All logs written to any container in this storage account will be ingested |
| Client ID | Generated when you register an app in Microsoft Entra ID (Step 2 below) | Also known as Application (client) ID |
| Client Secret | Generated in the registered app (Step 2 below) | Shown only once — copy and store securely |
| Tenant ID | Found on your Microsoft Entra ID home page | Also known as Directory ID |
| Storage Queue Name | Created in Step 3 below | The name of the queue that receives notifications from your storage account |
Note For reference, see the Microsoft Azure documentation on App registrations in Microsoft Entra ID (https://learn.microsoft.com/en-us/entra/identity-platform/quickstart-register-app) and Azure Storage Queues (https://learn.microsoft.com/en-us/azure/storage/queues/storage-queues-introduction).
Step 1 — Create a Storage Account
Create a new Azure Storage account. This is where your log files will be stored.
Sign in to the Azure portal at
In the left portal menu, select Storage accounts. On the Storage accounts page, click New.
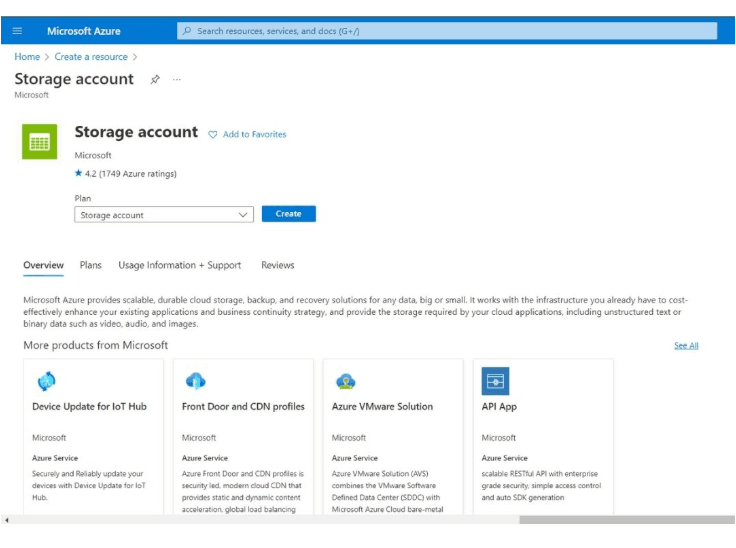
- On the Basics tab, fill in the required information for your storage account. Select Review + create to accept the default options, then click Create.
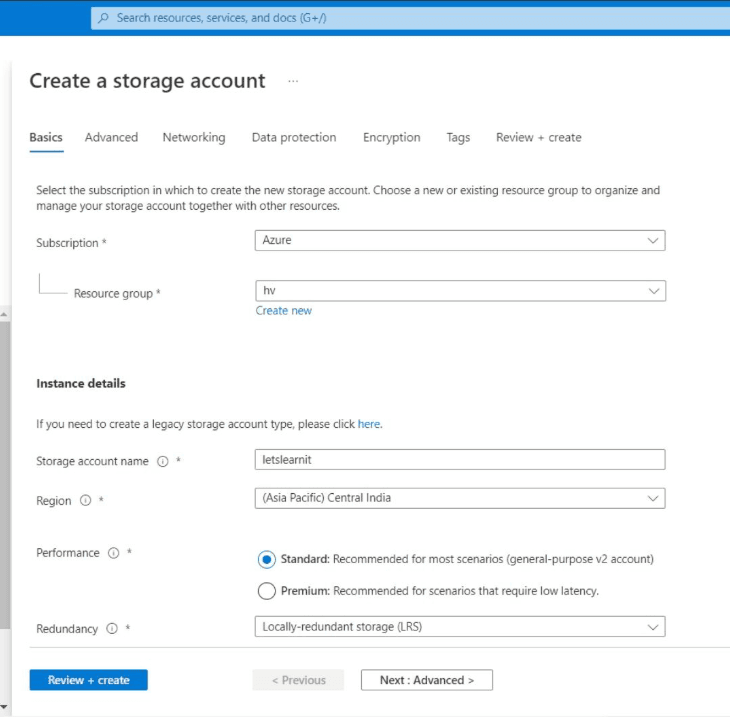
Note Note down the Storage Account Name you provide — you will need it to configure Bloo.
Step 2 — Register an Application in Microsoft Entra ID
Register an app in Microsoft Entra ID. This gives Bloo a secure identity to access your storage account without sharing credentials directly.
In the Azure portal, search for and open Microsoft Entra ID.
In the left menu, click App registrations. Click +Add, and in the dropdown menu that appears, select App registration.
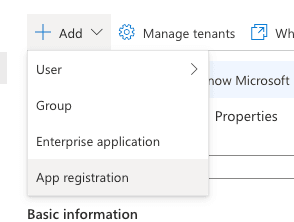
Enter a Name for the application and click Register.
On the app overview page, copy and securely store the Application (client) ID. This is your Client ID. Also note the Directory (tenant) ID — this is your Tenant ID.
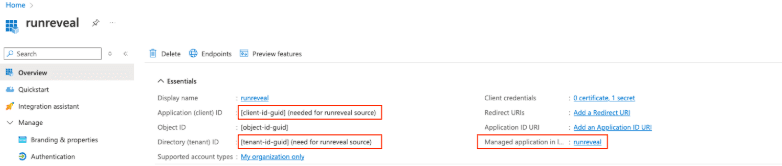
Warning The Client Secret generated in the next step is shown only once. Copy it immediately and store it securely.
On the right side of the app overview, click Add a certificate or secret. Click +New client secret. Enter a Description and click Add.
Copy the Client Secret value shown in the Value column. Store it securely — you will need it to configure Bloo.
Step 3 — Create a Storage Queue
Create a queue inside your storage account. Bloo monitors this queue to know when new log files arrive.
- Navigate to your newly created storage account. In the left navigation bar, select Queues. Click +Queue, enter a Name for the queue, and click OK.
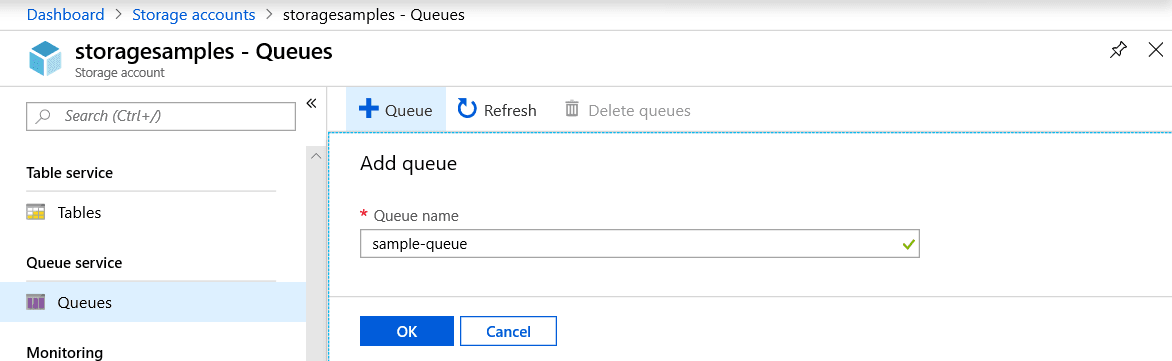
Note Note down the Queue Name you provide — you will need it to configure a connector in Bloo.
Click on your newly created queue. In the left navigation bar, click Access Control (IAM). Click +Add, then click Add Role Assignment.
Search for Storage Queue Data Message Processor and select the matching role. Click the Members tab, then click +Select Members. Search for the name of the registered app you created in Step 2 and click Select. Click Review + Assign.
Step 4 — Create a Container and Assign Role
Create a container inside your storage account where log files will be stored, and assign your registered app read access to it.
- Navigate to your storage account. In the left navigation bar, select Containers. Click +Container, enter a Name, and click Create.
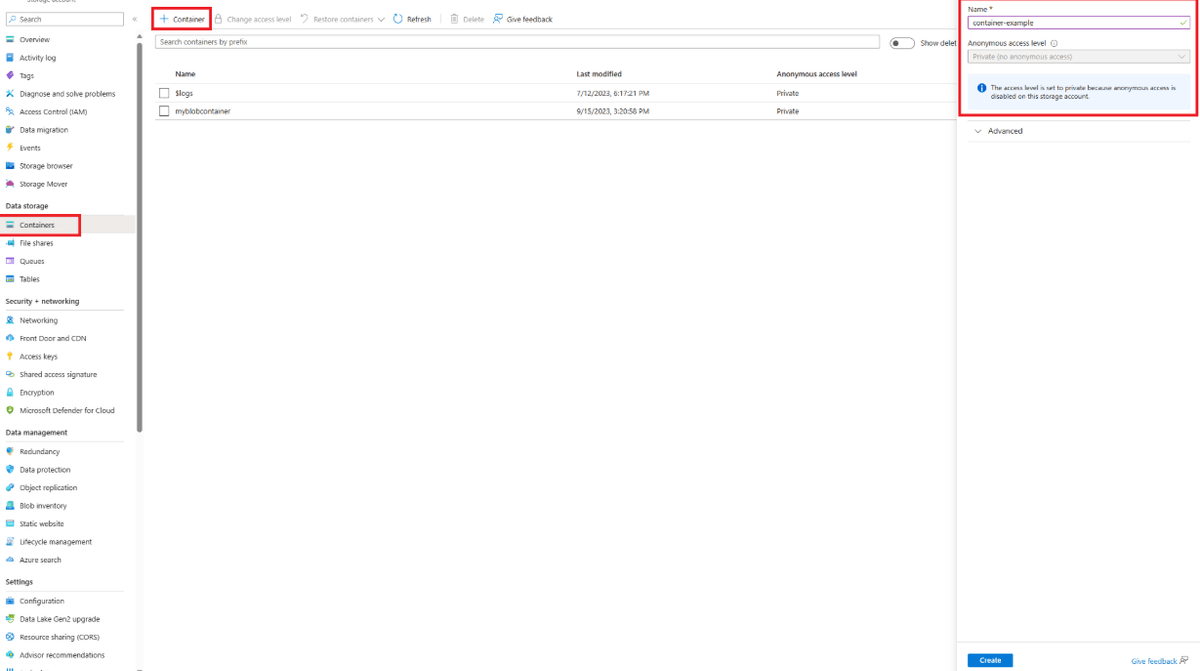
Note You do not need to provide the container name to Bloo — all logs written to any container in your storage account will be ingested automatically.
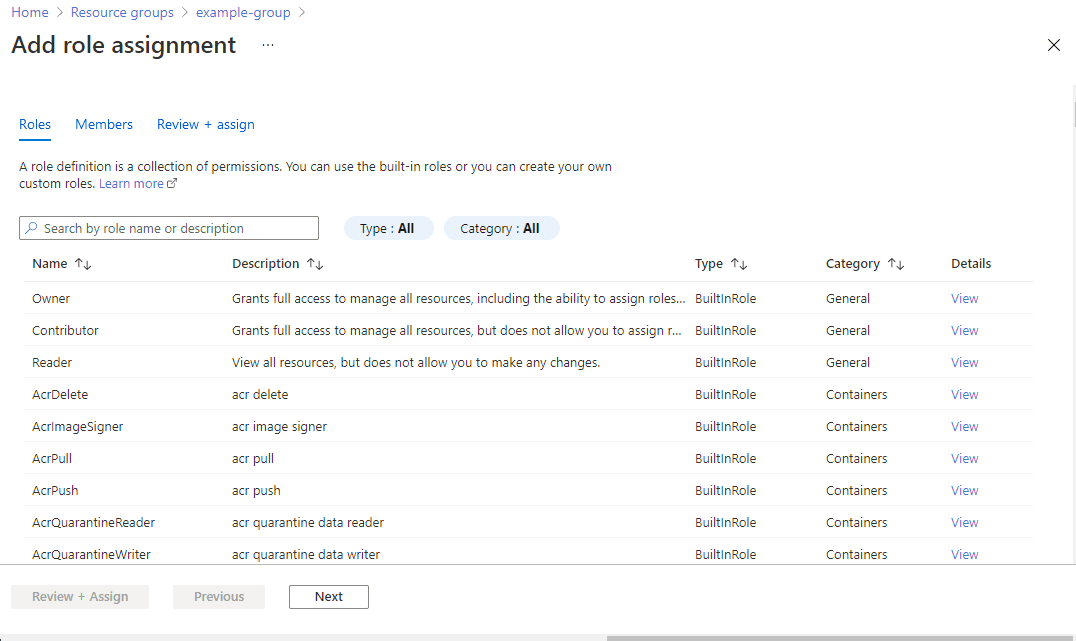
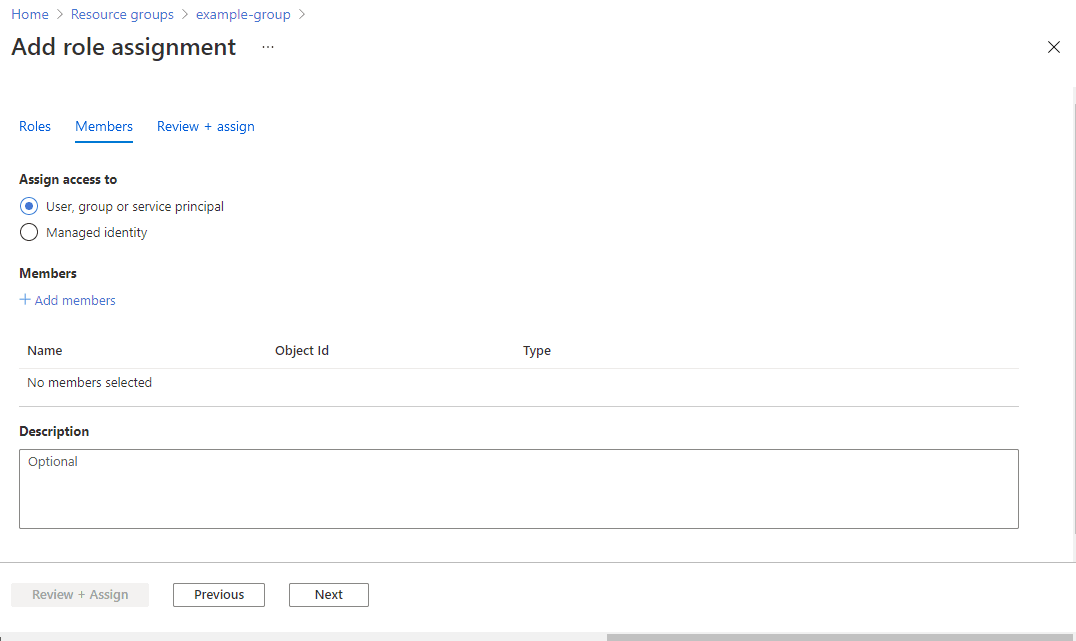
Click on your newly created container. In the left navigation bar, click Access Control (IAM). Click +Add, then click Add Role Assignment.
Search for Storage Blob Data Reader and select the matching role. Click the Members tab, then click +Select Members. Search for the name of the registered app you created in Step 2 and click Select. Click Review + Assign.
Step 5 — Configure the Connector in Bloo
With your credentials ready, set up the connector on the Datasource page in Bloo.
In Bloo, navigate to the Datasource page and click Add Datasource.
Search for and select Azure Blob Storage.
Fill in the configuration fields as described below.
| Field | Description | Example |
|---|---|---|
| Connector Name | A unique display name for this connector instance in Bloo. | AzureBlob-Prod |
| Tenant ID | Enter the Directory (tenant) ID from Step 2. | Paste from Step 2 |
| Client ID | Enter the Application (client) ID from Step 2. | Paste from Step 2 |
| Storage Account Name | Enter the name of the storage account from Step 1. | mystorageaccount |
| Storage Queue Name | Enter the name of the queue created in Step 3. | bloo-queue |
| Client Secret | Enter the Client Secret value generated in Step 2. | Paste from Step 2 |
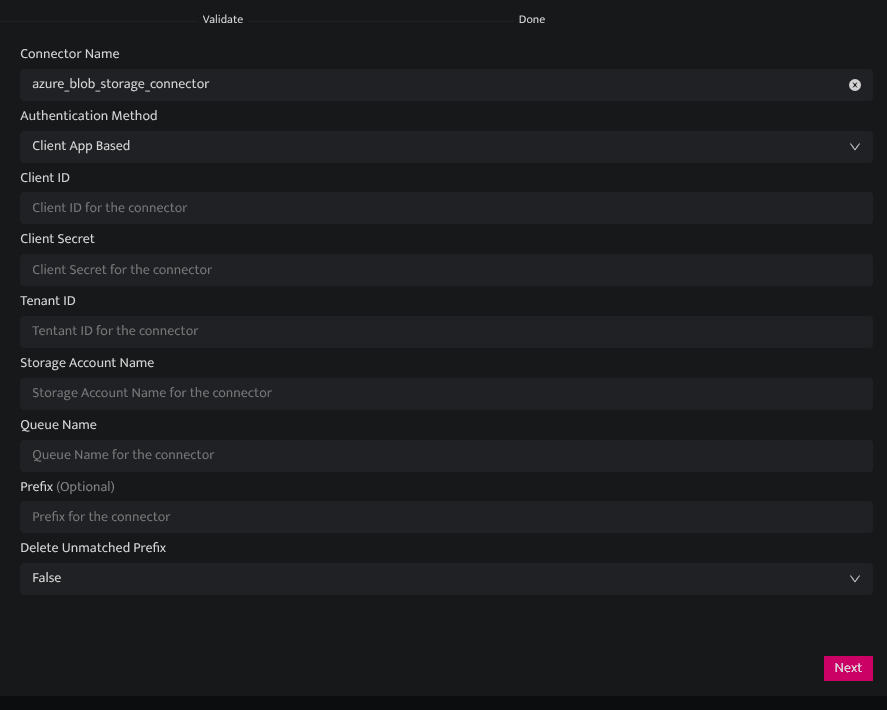
- Click Save. The connector proceeds directly to validation.
Confirmed Go to Collection Status (https://dnif.it/kb/operations/collection-status/) in Bloo and verify the Azure Blob Storage connector shows status Active.
Related: How to Configure Connectors Collection Status Azure Blob Storage Connector
Related
Was this page helpful?