
Connectors
Palo Alto: Add to Group / Remove from Group
Palo Alto: Add to Group / Remove from Group
Updated 2026-08-16
Automation Guide for Bloo
1. Overview
This guide describes how to configure Bloo to automate firewall host group updates on Palo Alto devices using SSH-based actions. Bloo connects to the firewall over SSH and executes commands to add or remove IP addresses from defined address groups, based on signals detected in Bloo.
The automation process assists in dynamic response for threat mitigation and host management.
2. Prerequisites
- A Palo Alto firewall with administrative SSH access.
- SSH credentials (username and key/password) that can execute configuration commands on the Palo Alto firewall.
- Bloo automation configured for firewalls with correct connectivity and credentials.
- Required address groups and security policy references already defined in the Palo Alto configuration.
3. Automation: Add Host to Group
Palo Alto: Add Host to Group
Objective: Add an IP address to a defined address group on a Palo Alto device based on Bloo search results. This enables Bloo to connect via SSH and execute commands on your firewall to block an IP.
3.1 Procedure
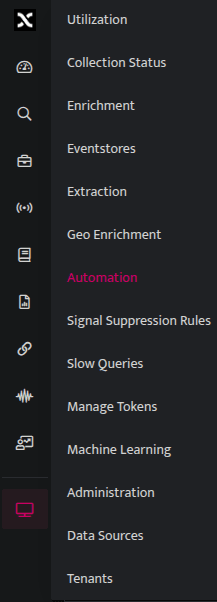
1. Navigate to Automations: Go to the Automations page in the Bloo console and select the Palo Alto: Add to Group automation.
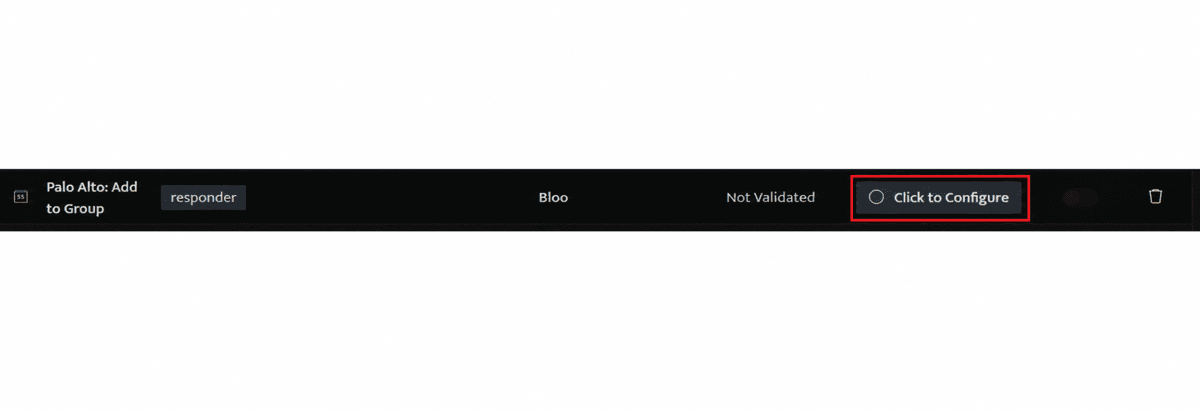
2. Configure the Automation: Click Edit and fill in the Configuration Fields as follows:
Configure the Add to Group Automation in Bloo
| Field | Description |
|---|---|
| Configuration Name | Give this a clear name so you recognize it later. Default: Palo Alto: Add to Group |
| Host IP Address | Enter the Management IP address of your Palo Alto Firewall. This is the IP Bloo will connect to over SSH, not the IP you want to act on. |
| Host Port | Enter 22 (This is the standard port for SSH connections). |
| Host Username | Enter the username of an admin account on the firewall that has permission to run, configure and commit commands. |
| Authentication Type | Select Password (or Key, depending on how your firewall is set up). |
| Host Password | Enter the password for the admin username provided above. |
| Commands to Execute | Enter the SSH commands as shown below. |
Enter the following commands in the Commands to Execute field:
configure
set address suspecthost ip-netmask suspecthost/32
set address-group [Address group name] static suspecthost
commit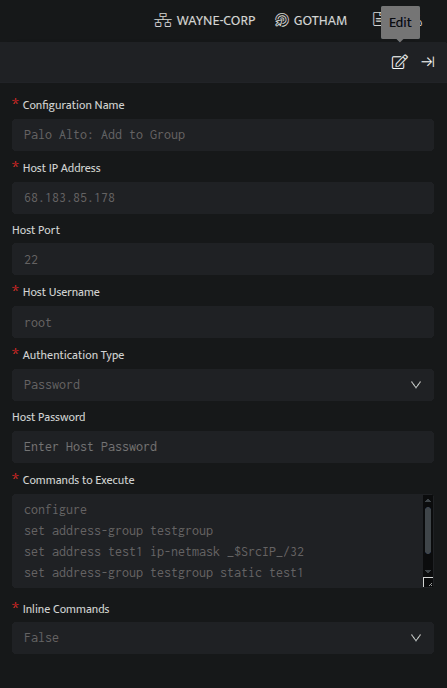
| **Important: Replace [Address group name]**Replace [Address group name] with the actual name of the blocklist group on your firewall. |
| **Note: Dynamic Variable (suspecthost)**Leave suspecthost exactly as written. Bloo will automatically replace this with the actual attacker's IP address when the automation runs. |
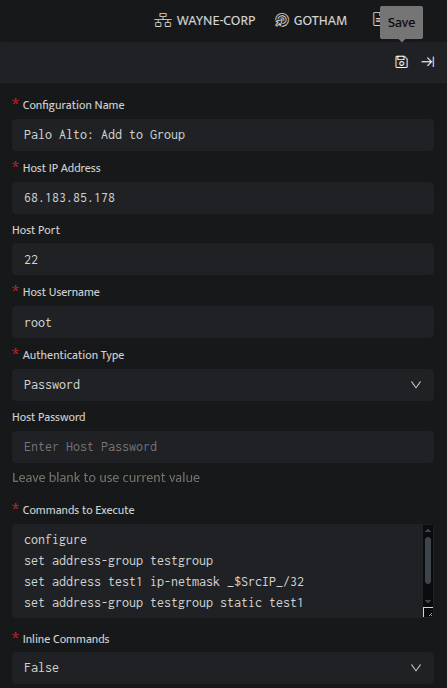
3. Save: Click Save to save the Palo Alto: Add to Group automation.
4. Enable: Enable the Palo Alto: Add to Group automation using the toggle on the Automations page.
5. Configure the Workbook: Once the automation configuration is saved, create a Workbook to trigger it.
1. Add a Parameter
This parameter enables taking direct action on any suspect host or IP by clicking it from the Signals page.
Go to the Find tab.
Click Add a Parameter.
Enter the required details. This parameter will hold the IP or hostname that the automation will act upon.
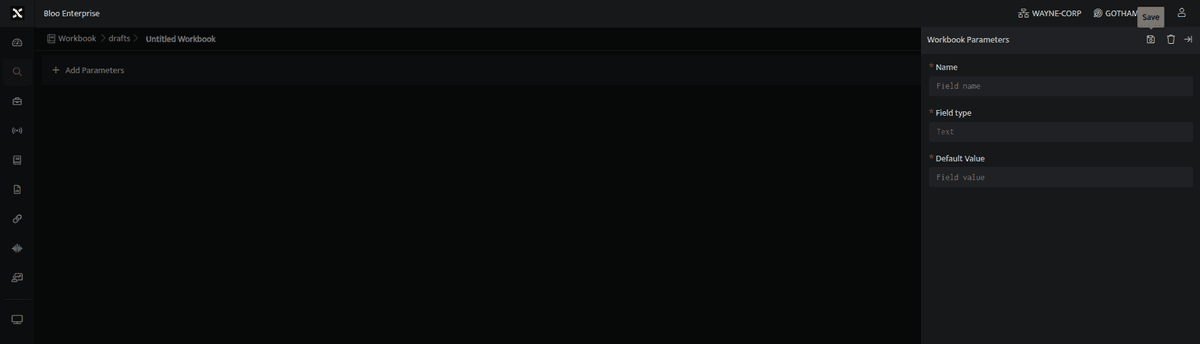
| Field | Details |
|---|---|
| Name | Host |
| Field Type | 'will not be clickable' |
| Default Value | - |
2. Add a DQL Block
Create a DQL block to fetch the relevant signals based on the selected host:
stream=signals where suspecthost="{{Host}}" | duration 1d | select suspecthost | limit 1
3. Trigger the Automation
Add another DQL block to execute the automation via SSH:
_trigger api ssh execute_command '<Configuration Name>'Replace <Configuration Name> with the exact name of the automation you configured in Section 3.1, Step 2.
4. Save the Workbook
Update the workbook name and save it.
6. Take Action on the IP: To take direct action on any suspicious host or IP from the Signals page:
Navigate to the Signals page and open the Investigation Panel by clicking the desired suspect.
In the panel, you will see a list of configured Playbooks under the Investigate section.
The Workbook Name you created to trigger the automation will appear in this list.
To execute the automation, click the Play button located to the right of the workbook name.
This action will immediately trigger the automation using the selected IP (suspecthost) as input.
4. Automation: Remove Host from Group
Palo Alto: Remove Host from Group
Objective: Remove an IP address from a defined address group on a Palo Alto device based on Bloo search results. This enables Bloo to connect via SSH and execute commands on your firewall to whitelist an IP.
4.1 Procedure
1. Navigate to Automations: Go to the Automations page in the Bloo console and select the Palo Alto: Remove from Group automation.
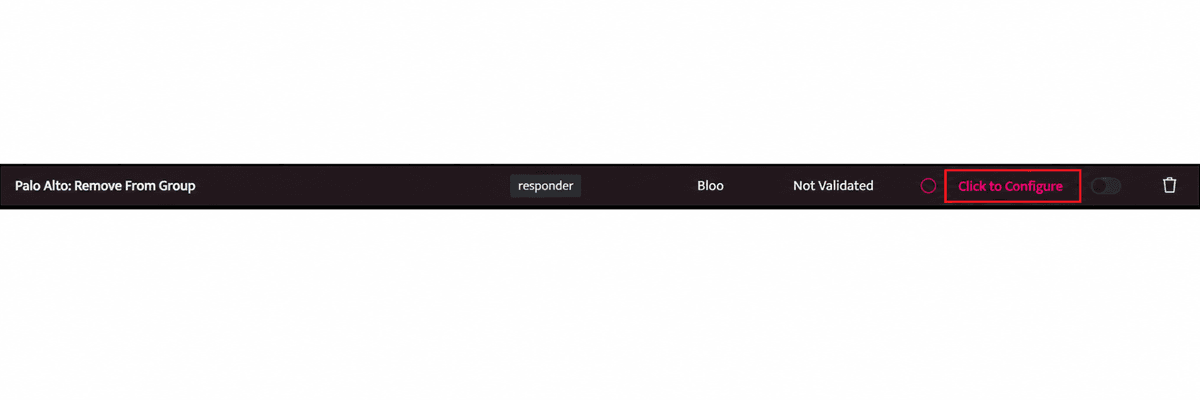
2. Configure the Automation: Click Edit and fill in the Configuration Fields as follows:
Configure the Remove from Group Automation in Bloo
| Field | Description |
|---|---|
| Configuration Name | Give this a clear name so you recognize it later. Default: Palo Alto: Remove from Group |
| Host IP Address | Enter the Management IP address of your Palo Alto Firewall. This is the IP Bloo will connect to over SSH, not the IP you want to act on. |
| Host Port | Enter 22 (This is the standard port for SSH connections). |
| Host Username | Enter the username of an admin account on the firewall that has permission to run, configure and commit commands. |
| Authentication Type | Select Password (or Key, depending on how your firewall is set up). |
| Host Password | Enter the password for the admin username provided above. |
| Commands to Execute | Enter the SSH commands as shown below. |
Enter the following commands in the Commands to Execute field:
configure
delete address-group [Address group name] static suspecthost
commit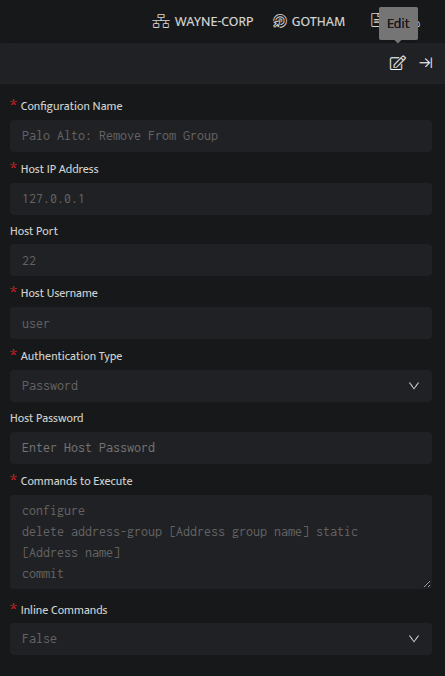
| **Important: Replace [Address group name]**Replace [Address group name] with the actual name of the blocklist group on your firewall. |
3. Save: Click Save to save the Palo Alto: Remove from Group automation.
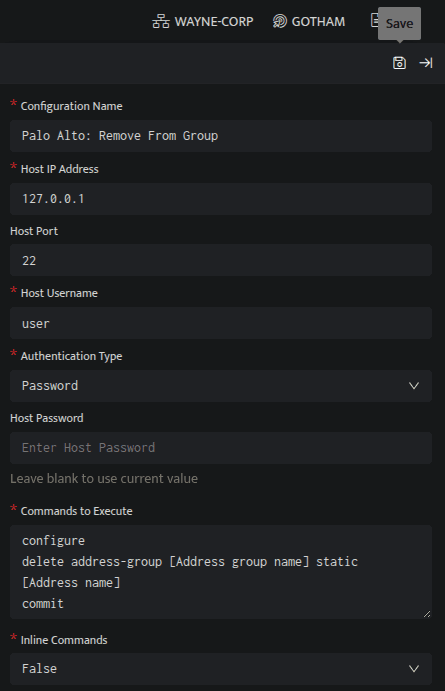 4. Enable: Enable the Palo Alto: Remove from Group automation using the toggle on the Automations page.
5. Configure the Workbook: Once the automation configuration is saved, create a Workbook to trigger it.
1. Add a Parameter
This parameter enables taking direct action on any suspect host or IP by clicking it from the Signals page.
Go to the Find tab.
Click Add a Parameter.
Enter the required details. This parameter will hold the IP or hostname that the automation will act upon.
| Field | Details |
|---|---|
| Name | Host |
| Field Type | 'will not be clickable' |
| Default Value | - |
2. Add a DQL Block
Create a DQL block to fetch the relevant signals based on the selected host:
stream=signals where suspecthost="{{Host}}" | duration 1d | select suspecthost | limit 13. Trigger the Automation
Add another DQL block to execute the automation via SSH:
_trigger api ssh execute_command '<Configuration Name>'Replace <Configuration Name> with the exact name of the automation you configured in Section 4.1, Step 2.
4. Save the Workbook
Update the workbook name and save it.
6. Take Action on the IP: To take direct action on any suspicious host or IP from the Signals page:
Navigate to the Signals page and open the Investigation Panel by clicking the desired suspect.
In the panel, you will see a list of configured Playbooks under the Investigate section.
The Workbook Name you created to trigger the automation will appear in this list.
To execute the automation, click the Play button located to the right of the workbook name.
This action will immediately trigger the automation using the selected IP (suspecthost) as input.
5. Validation Steps
To confirm the automation is active and working (applies to both Add to Group and Remove from Group):
1. After clicking Play, check the workbook output in the Investigation Panel.
2. Confirm that the SSHstatus field in the output shows True. This confirms that Bloo successfully connected to the firewall over SSH and executed the commands.
| ConfirmedWhen the workbook output shows SSHstatus = True, the automation is correctly configured and the action has been executed on the Palo Alto firewall. |
6. Related Links
Related
Was this page helpful?