
Connectors
Auth0 Connector
Connectors in Bloo
Updated 2026-08-17
Auth0 integrates with Bloo using the pull method via the Auth0 Management API. Once configured, Bloo collects, normalizes, and monitors Auth0 log events — including logins, failures, token exchanges, and administrative actions — to help identify suspicious activity across your Auth0 tenant.
Before You Begin — Prerequisites
You'll need the following from your Auth0 account before configuring the connector in Bloo.
| Requirement | Where to Get It | Notes |
|---|---|---|
| Auth0 Account | Sign in at manage.auth0.com | Must have admin access to create applications |
| Domain | Found under Applications → your app → Settings → Basic Information | Format: your-tenant.auth0.com |
| Client ID | Found under Applications → your app → Settings → Basic Information | Generated automatically when the application is created |
| Client Secret | Found under Applications → your app → Settings → Basic Information | Hidden by default — click Reveal Client Secret to view it |
ℹ For reference, see the Auth0 documentation on Application Settings and the Auth0 Management API.
Step 1 — Create a Machine-to-Machine Application in Auth0
Follow these steps inside your Auth0 dashboard to create an application and retrieve the credentials Bloo needs.
Sign in to the Auth0 Dashboard at
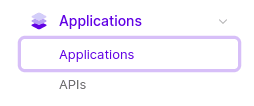
In the left sidebar, go to Applications and click Applications.
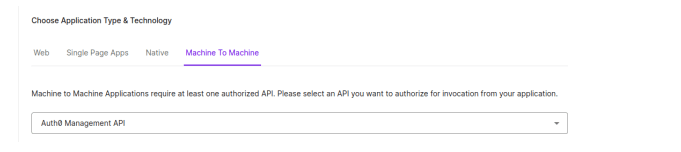
- Click Create Application. Enter a name, then select Machine to Machine Applications as the application type. This tells Auth0 that Bloo will pull logs automatically as a backend service — no user login involved. Click Create.

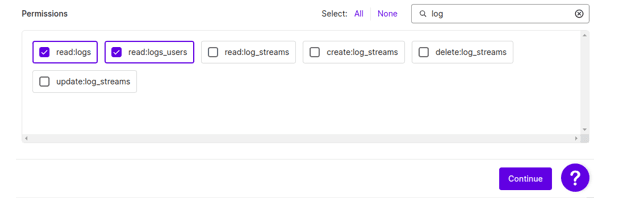
- Select Auth0 Management API from the dropdown. In the permissions section below, enable read:logs and read:logs_users, then click Authorize.
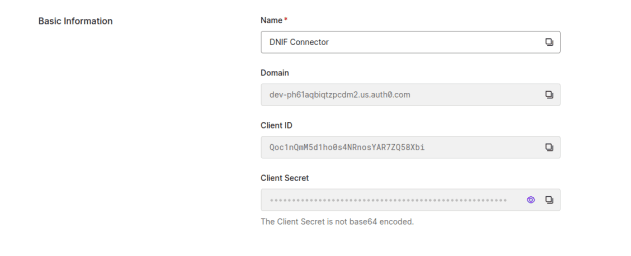
- Click the Settings tab of your newly created application and scroll down to the Basic Information section.
⚠ Important: The Client Secret is hidden by default. Click Reveal Client Secret to make it visible before copying.
Copy the Domain, Client ID, and Client Secret — these are the credentials you will enter into Bloo. Store them securely.
Step 2 — Configure the Connector in Bloo
With the credentials from Step 1, set up the connector on the Datasource page in Bloo.
In Bloo, navigate to the Datasource page and click Add Datasource.
Search for and select Auth0.
Fill in the configuration fields as described below.
| Field | Description | Example |
|---|---|---|
| Connector Name | A unique display name for this connector instance in Bloo. | Auth0-Prod |
| Domain | Enter the Domain from Step 1. | your-tenant.auth0.com |
| Client ID | Enter the Client ID from Step 1. | Paste from Step 1 |
| Client Secret | Enter the Client Secret from Step 1. | Paste from Step 1 |
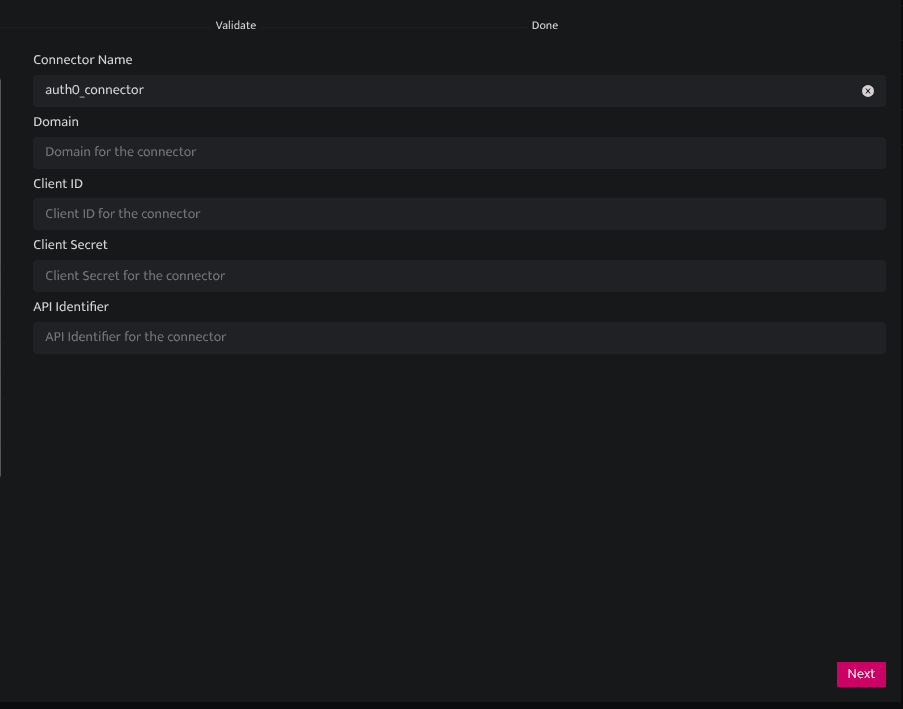
- Click Save. The connector proceeds directly to validation.
✓ Go to Collection Status in Bloo and verify the Auth0 connector shows status Active.
Related
Was this page helpful?