
Connectors
CrowdStrike Connector
Connectors in Bloo
Updated 2026-08-17
This connector integrates CrowdStrike Falcon with Bloo using the Falcon Event Streams API. Once configured, Bloo continuously pulls security event data from your CrowdStrike environment — detections, authentication events, and endpoint activity — for real-time monitoring, correlation, and alerting.
Before You Begin — Prerequisites
You'll need the following from your CrowdStrike Falcon account before configuring the connector in Bloo.
| Requirement | Where to Get It | Notes |
|---|---|---|
| Client ID | Generated when you create an API client (Step 1 below) | Treat like a username — safe to store, but keep private |
| Client Secret (API Key) | Shown only once during API client creation | Copy and save immediately — CrowdStrike does not show this again after creation |
| Falcon Administrator role | Assigned by your CrowdStrike org admin | Required to create or manage API clients |
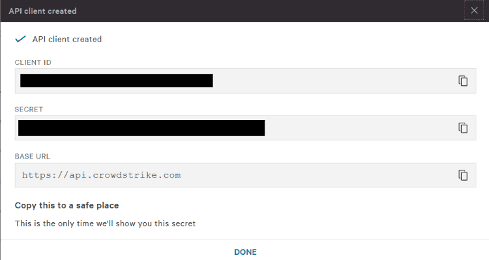
Warning Important: The Client Secret is displayed only once at the time of API client creation. If you miss copying it, you must delete the API client and create a new one.
Step 1 — Create an API Client in CrowdStrike Falcon
This generates the credentials Bloo needs to pull event data from your CrowdStrike environment.
Log in to the Falcon console at https://falcon.crowdstrike.com (use your region-specific URL if applicable).
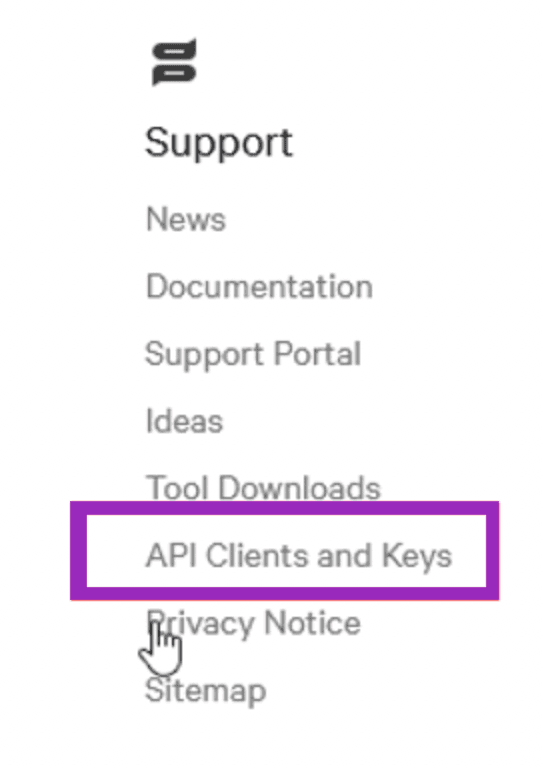
In the left navigation, go to Support & Resources → API Clients and Keys.
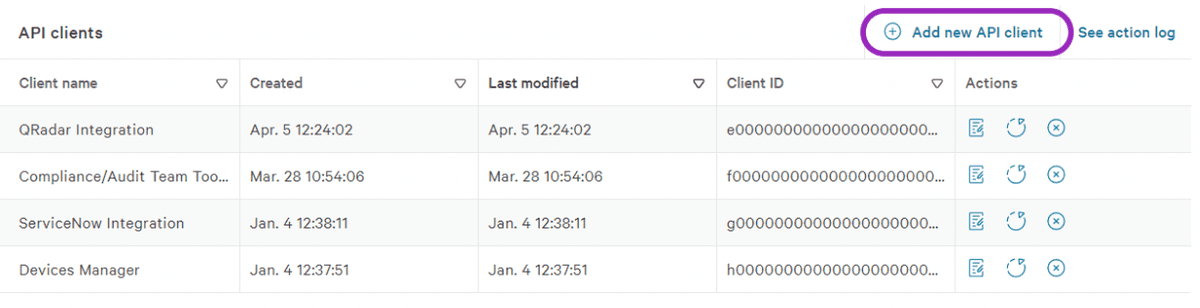
- Click + Add new API Client.
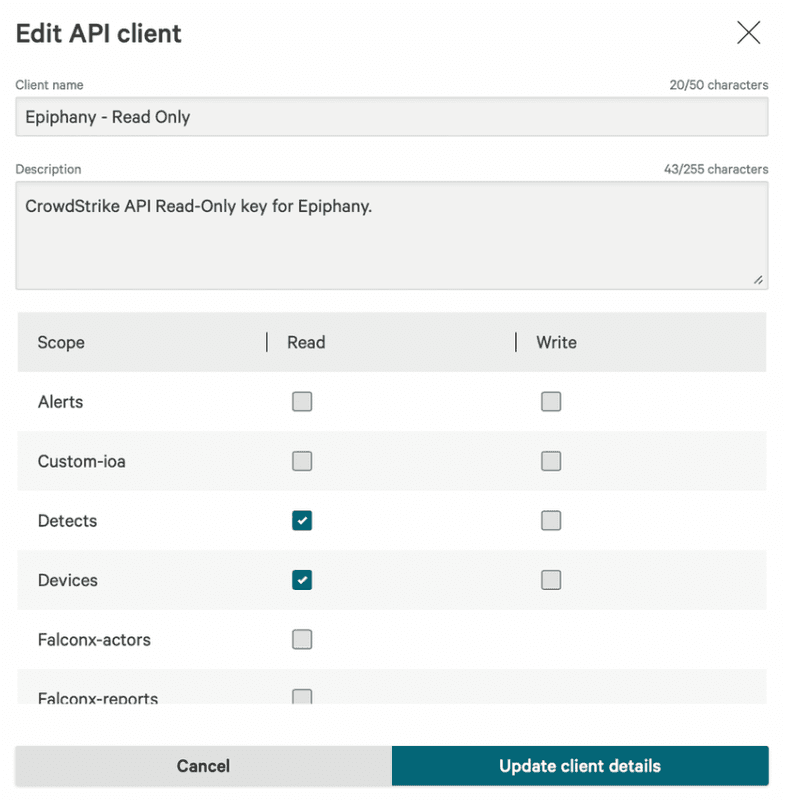
Enter a Client Name (e.g., Bloo-Integration) and optionally a description so it's easy to identify later.
Under API Scopes, enable Read access for the following scopes:
| Scope | Access Level | Why It's Needed |
|---|---|---|
| Event Streams | Read | Core requirement — streams real-time security events to Bloo |
| Detections | Read | Allows ingestion of detection and alert data |
Do not enable write or delete scopes — Bloo only needs read access. Keeping permissions minimal is recommended.
Click Add to create the API client.
On the confirmation screen, copy and securely store both values:
Client ID
Client Secret — visible only once; save it before closing this screen
Step 2 — Configure the Connector in Bloo
With the credentials from Step 1, set up the connector on the Datasource page in Bloo.
In Bloo, navigate to the Datasource page and click Add Datasource.
Search for and select CrowdStrike.
Fill in the configuration fields as described below.
| Field | Description | Example |
|---|---|---|
| Connector Name | A label to identify this connector in Bloo | CrowdStrike-Prod |
| CrowdStrike Domain | Select your CrowdStrike cloud region from the dropdown. If unsure, check the URL you use to log into the Falcon console — the subdomain indicates your region. US-1 api.crowdstrike.com US-2 api.us-2.crowdstrike.com EU-1 api.eu-1.crowdstrike.com US-GOV-1 api.laggar.gcw.crowdstrike.com | — |
| Client ID | The Client ID from your Falcon API client | Paste from Step 1 |
| API Key (Client Secret) | The Client Secret from your Falcon API client | Paste from Step 1 |
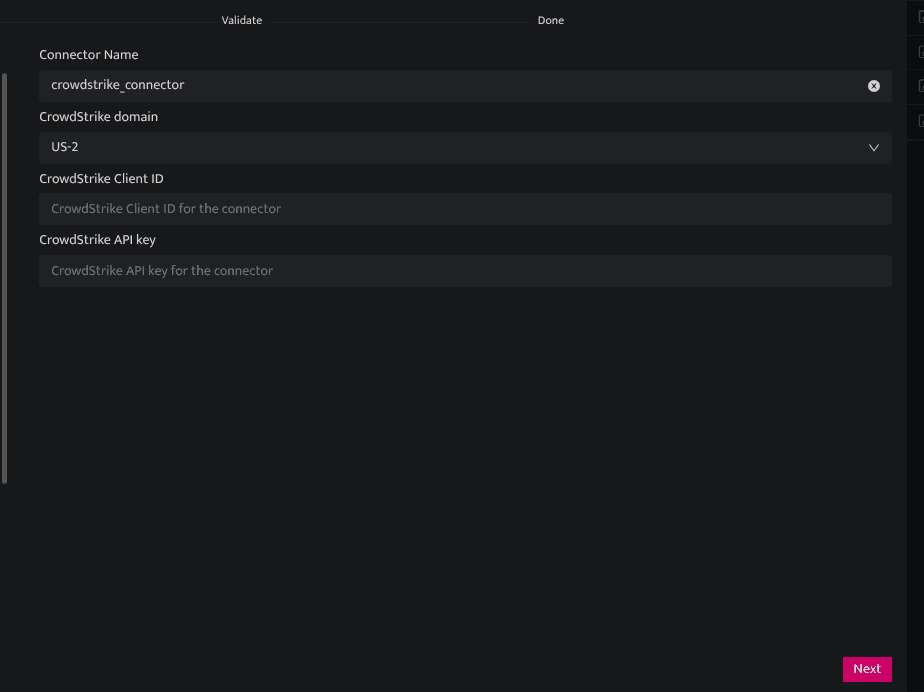
- Click Save. The connector will proceed directly to the validation stage.
Confirmed To confirm the connector is working, go to Collection Status in the Bloo console and verify the CrowdStrike connector is listed with status Active. This means the connection has been validated and data ingestion has begun.
Related: How to Configure Connectors Collection Status
Related
Was this page helpful?